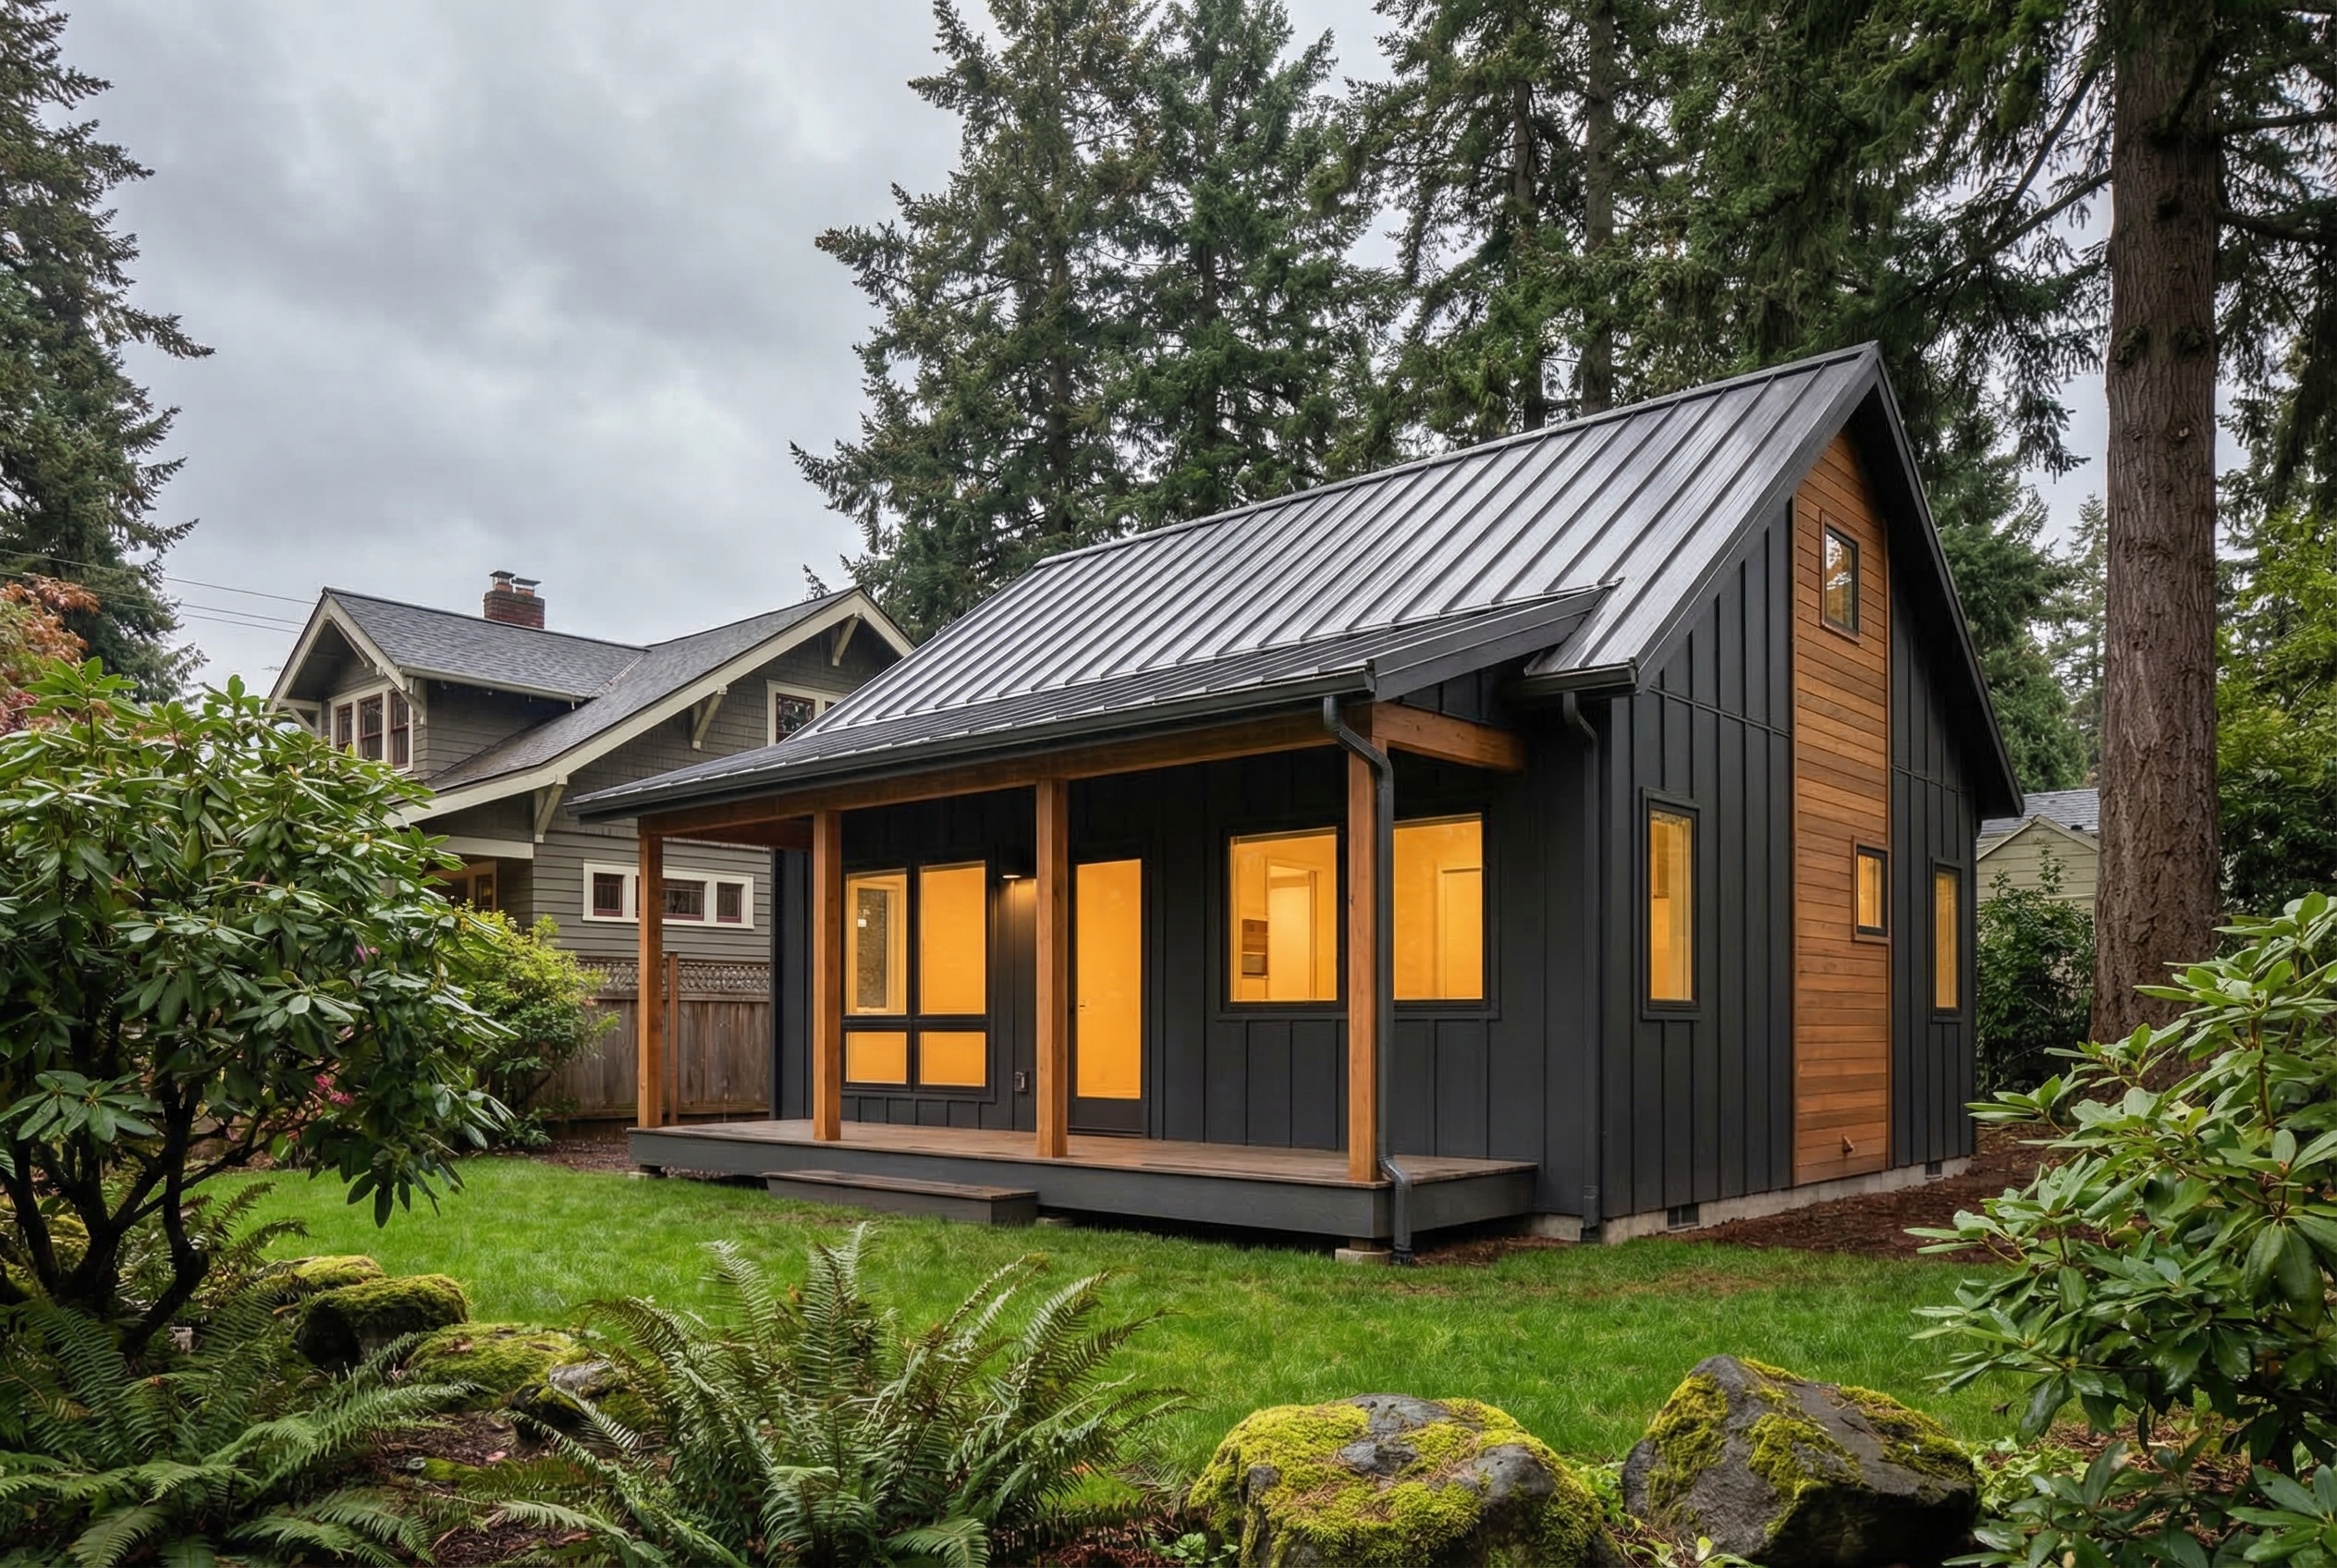
Tub-to-Shower Conversions in Puyallup, WA
That old tub nobody uses? I turn it into a walk-in shower that opens up the bathroom and adds real value to your home.
Our Tub-to-Shower Conversions Services
The Tub Nobody Uses
I ask this question on almost every bathroom consultation: “When was the last time anyone actually took a bath in that tub?” The answer is usually a long pause followed by a laugh. “Maybe… two years ago?”
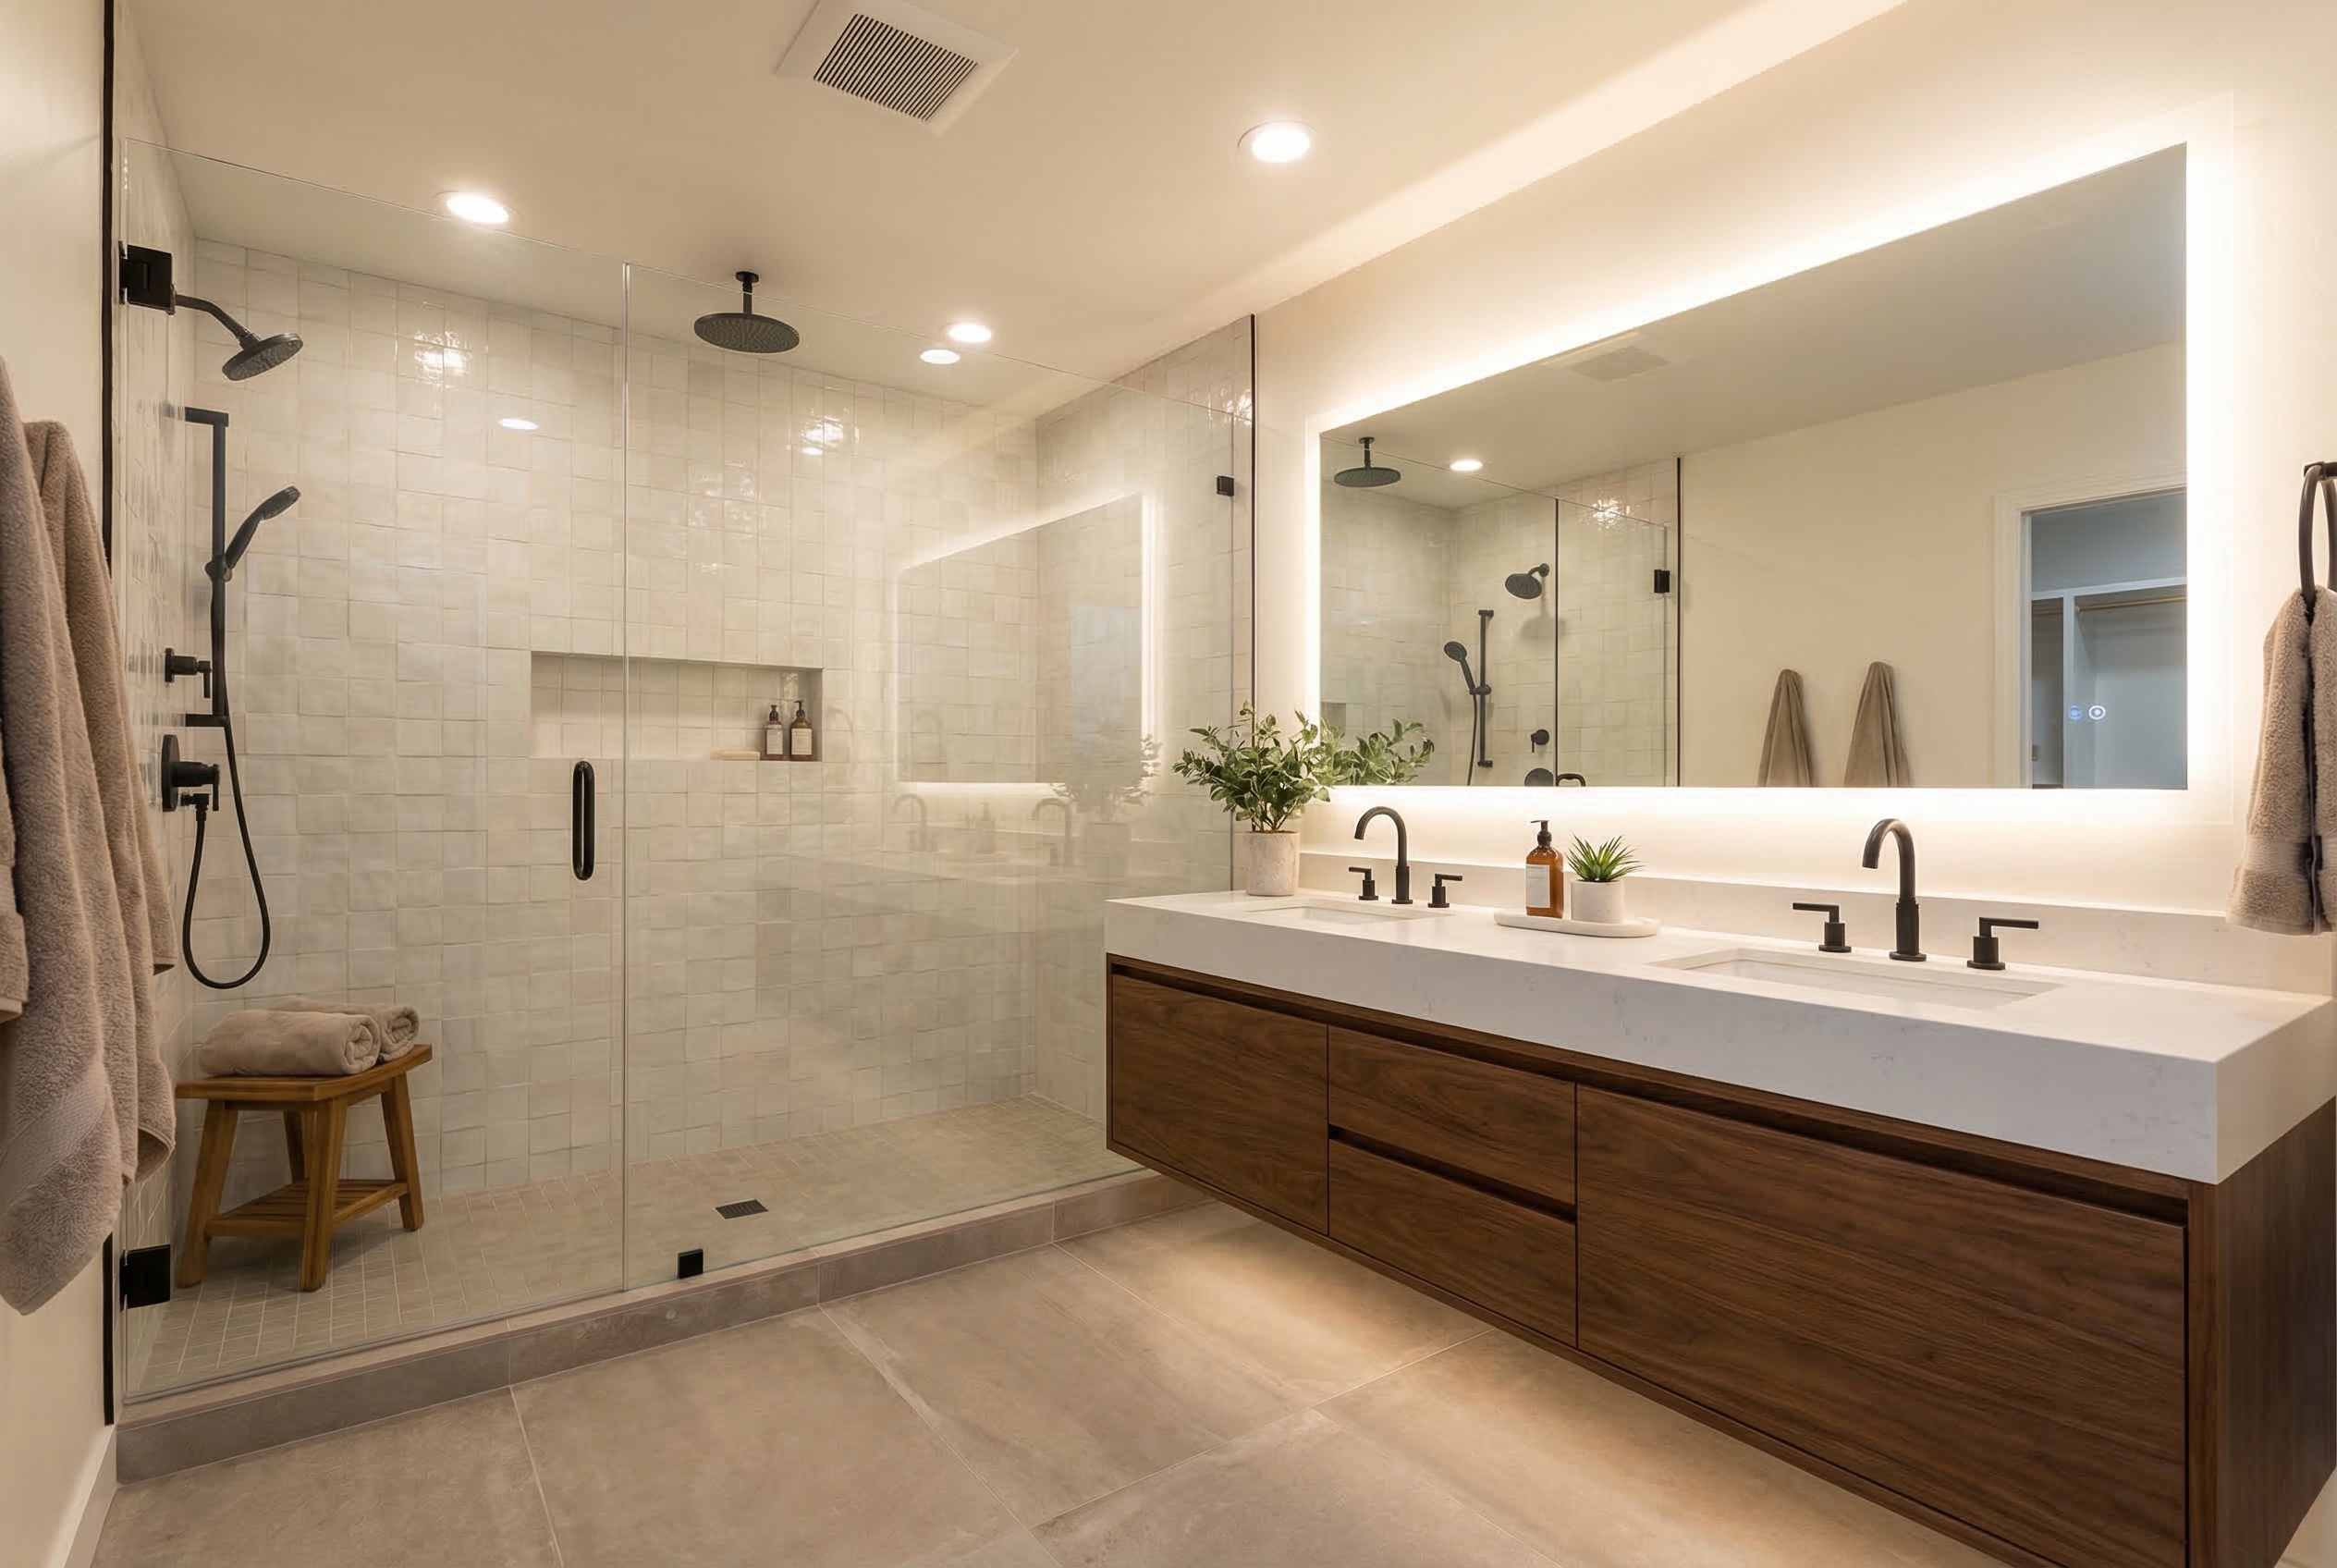
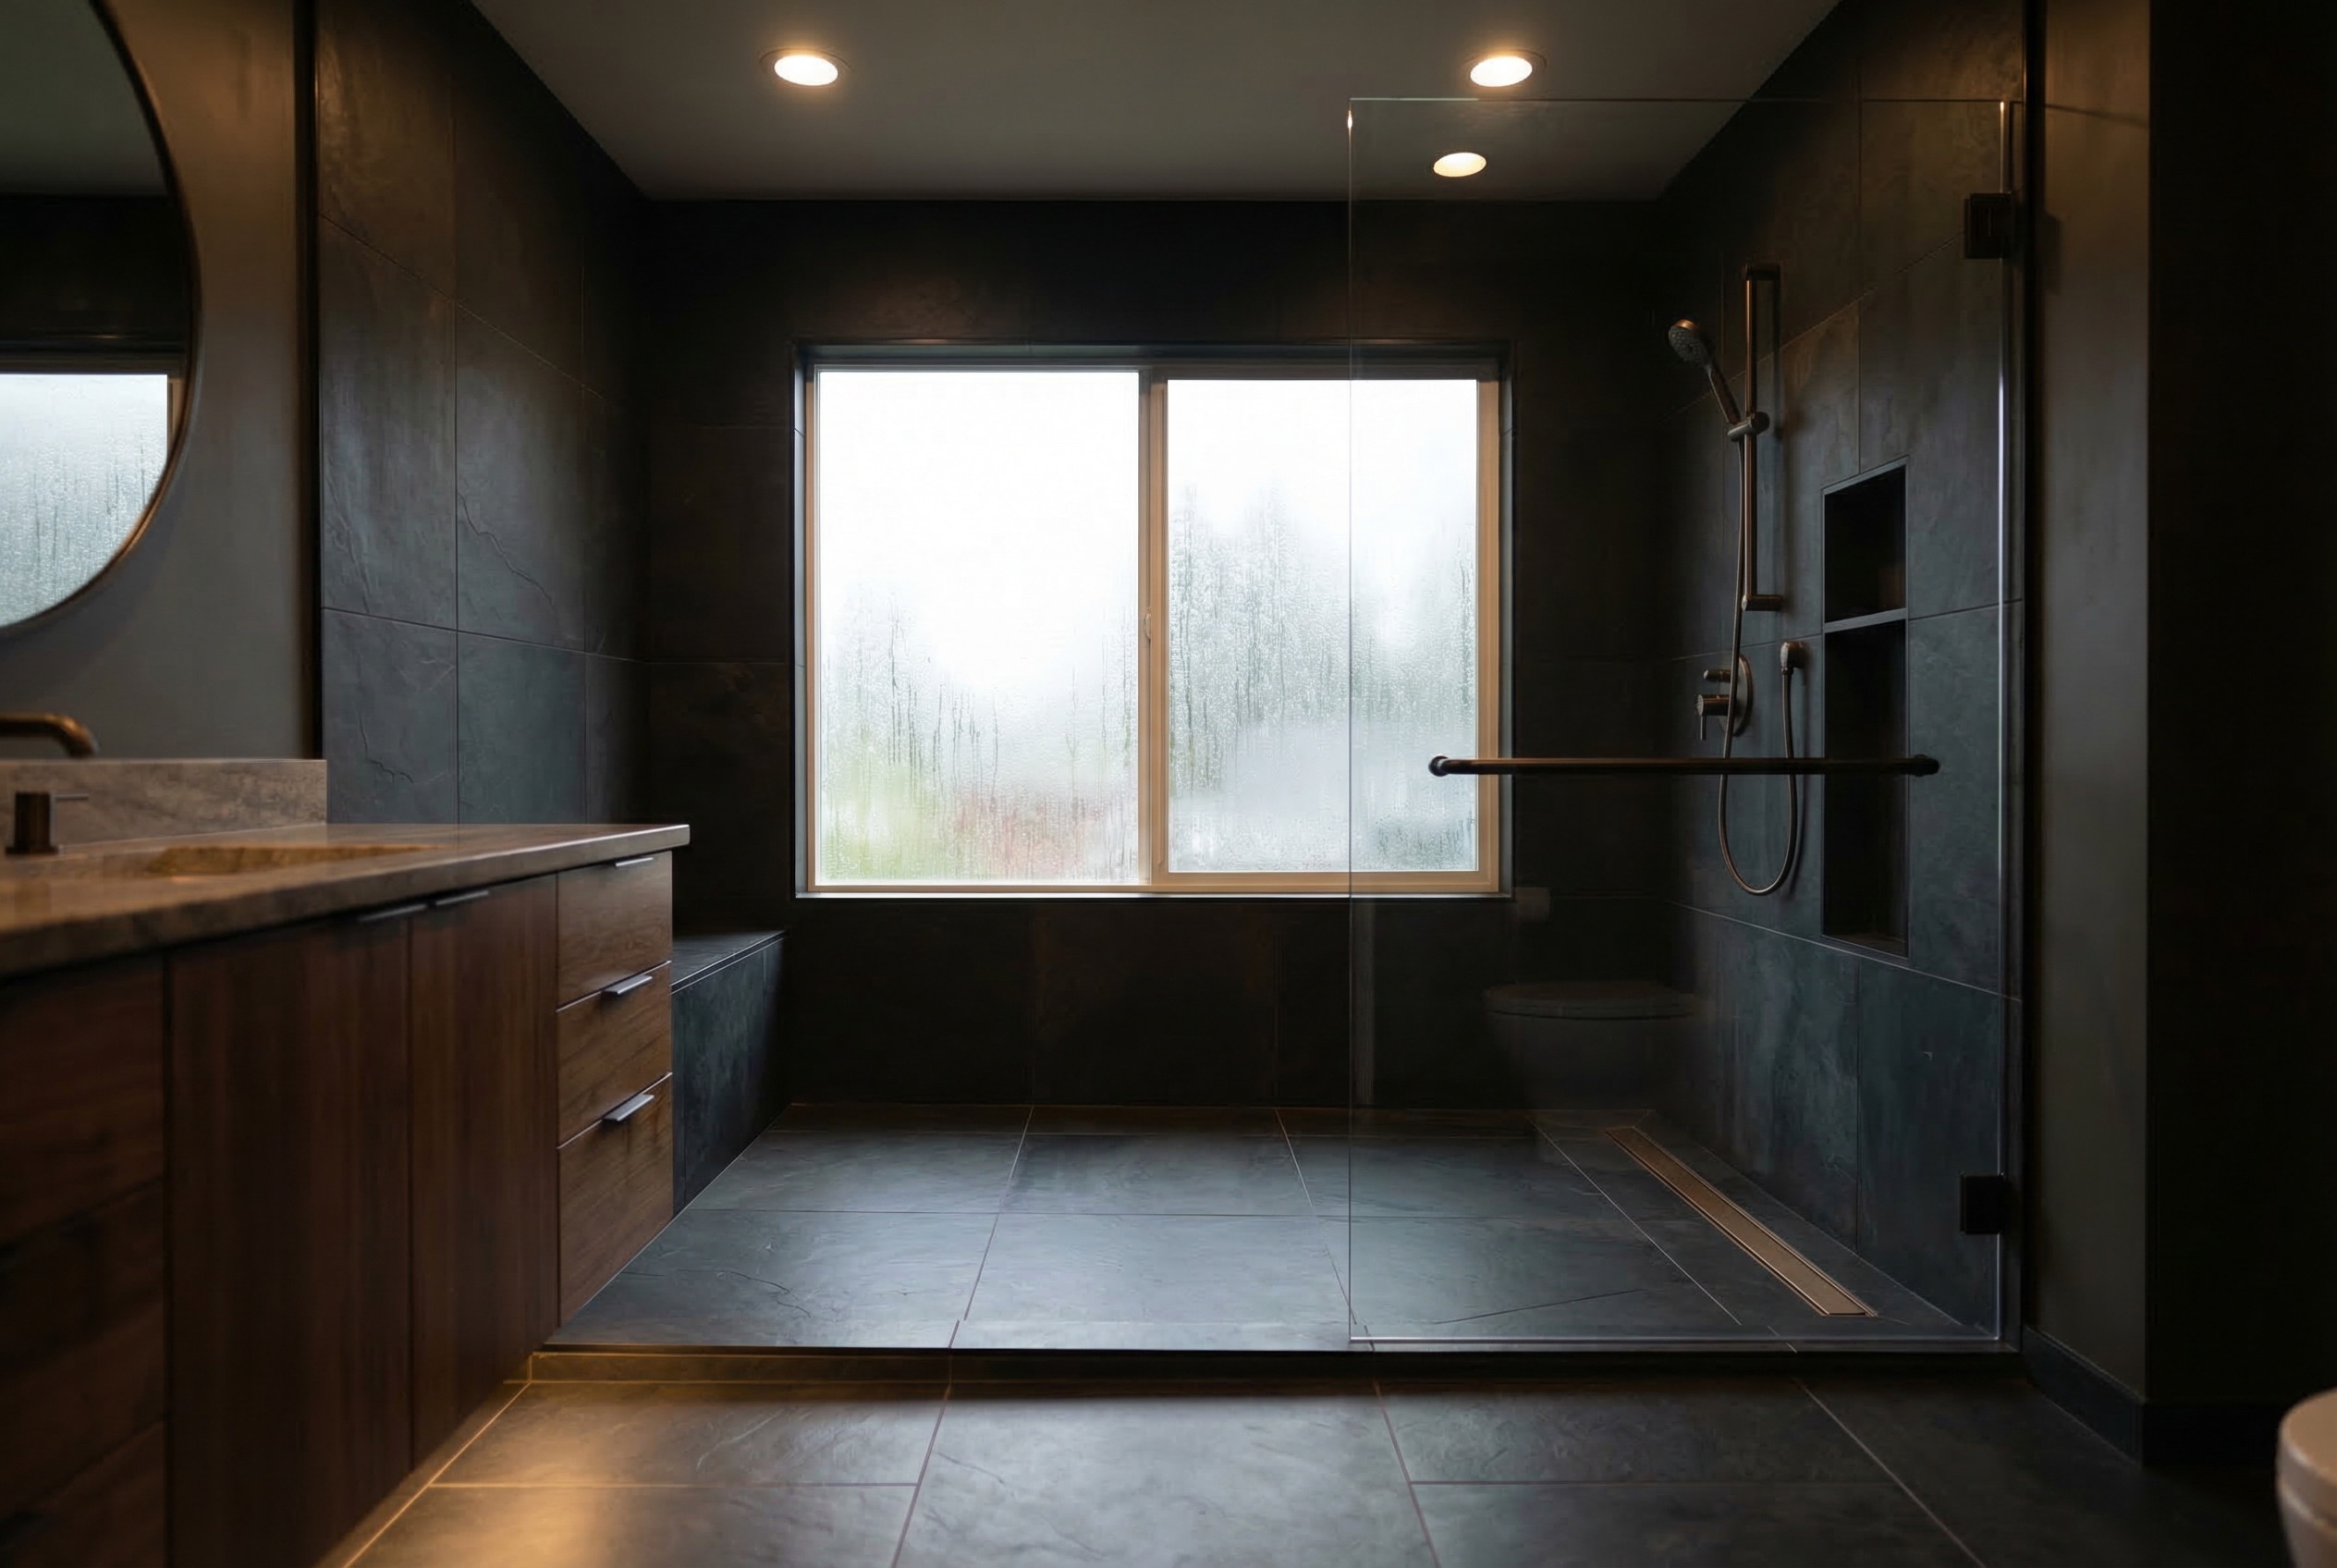
That tub is taking up 15 square feet of prime bathroom space. It makes the room feel cramped. The shower curtain makes it feel dated. And the step over the tub wall is getting harder every year. I’ve converted hundreds of bathtubs to walk-in showers across Puyallup and Pierce County, and it’s the single most impactful bathroom upgrade I do. The room looks bigger, feels more modern, and actually gets used the way your family needs it.
What’s Involved in a Conversion
This isn’t a one-day acrylic insert job. I build custom tile showers with proper waterproofing, real glass, and plumbing done to code. Here’s what happens step by step.
Demo (Day 1) We remove the old tub, surround, and any backer material. The tub goes out in pieces to avoid damaging door frames and hallways. Fiberglass tubs cut out with a reciprocating saw. Cast iron tubs are heavier and take more work to remove, but I’ve pulled out hundreds of them. Once the tub is out, we inspect the framing, subfloor, and existing plumbing. In PNW homes, I find moisture damage behind about 30% of tub surrounds. If there’s rot, we fix it now before it becomes a bigger problem.
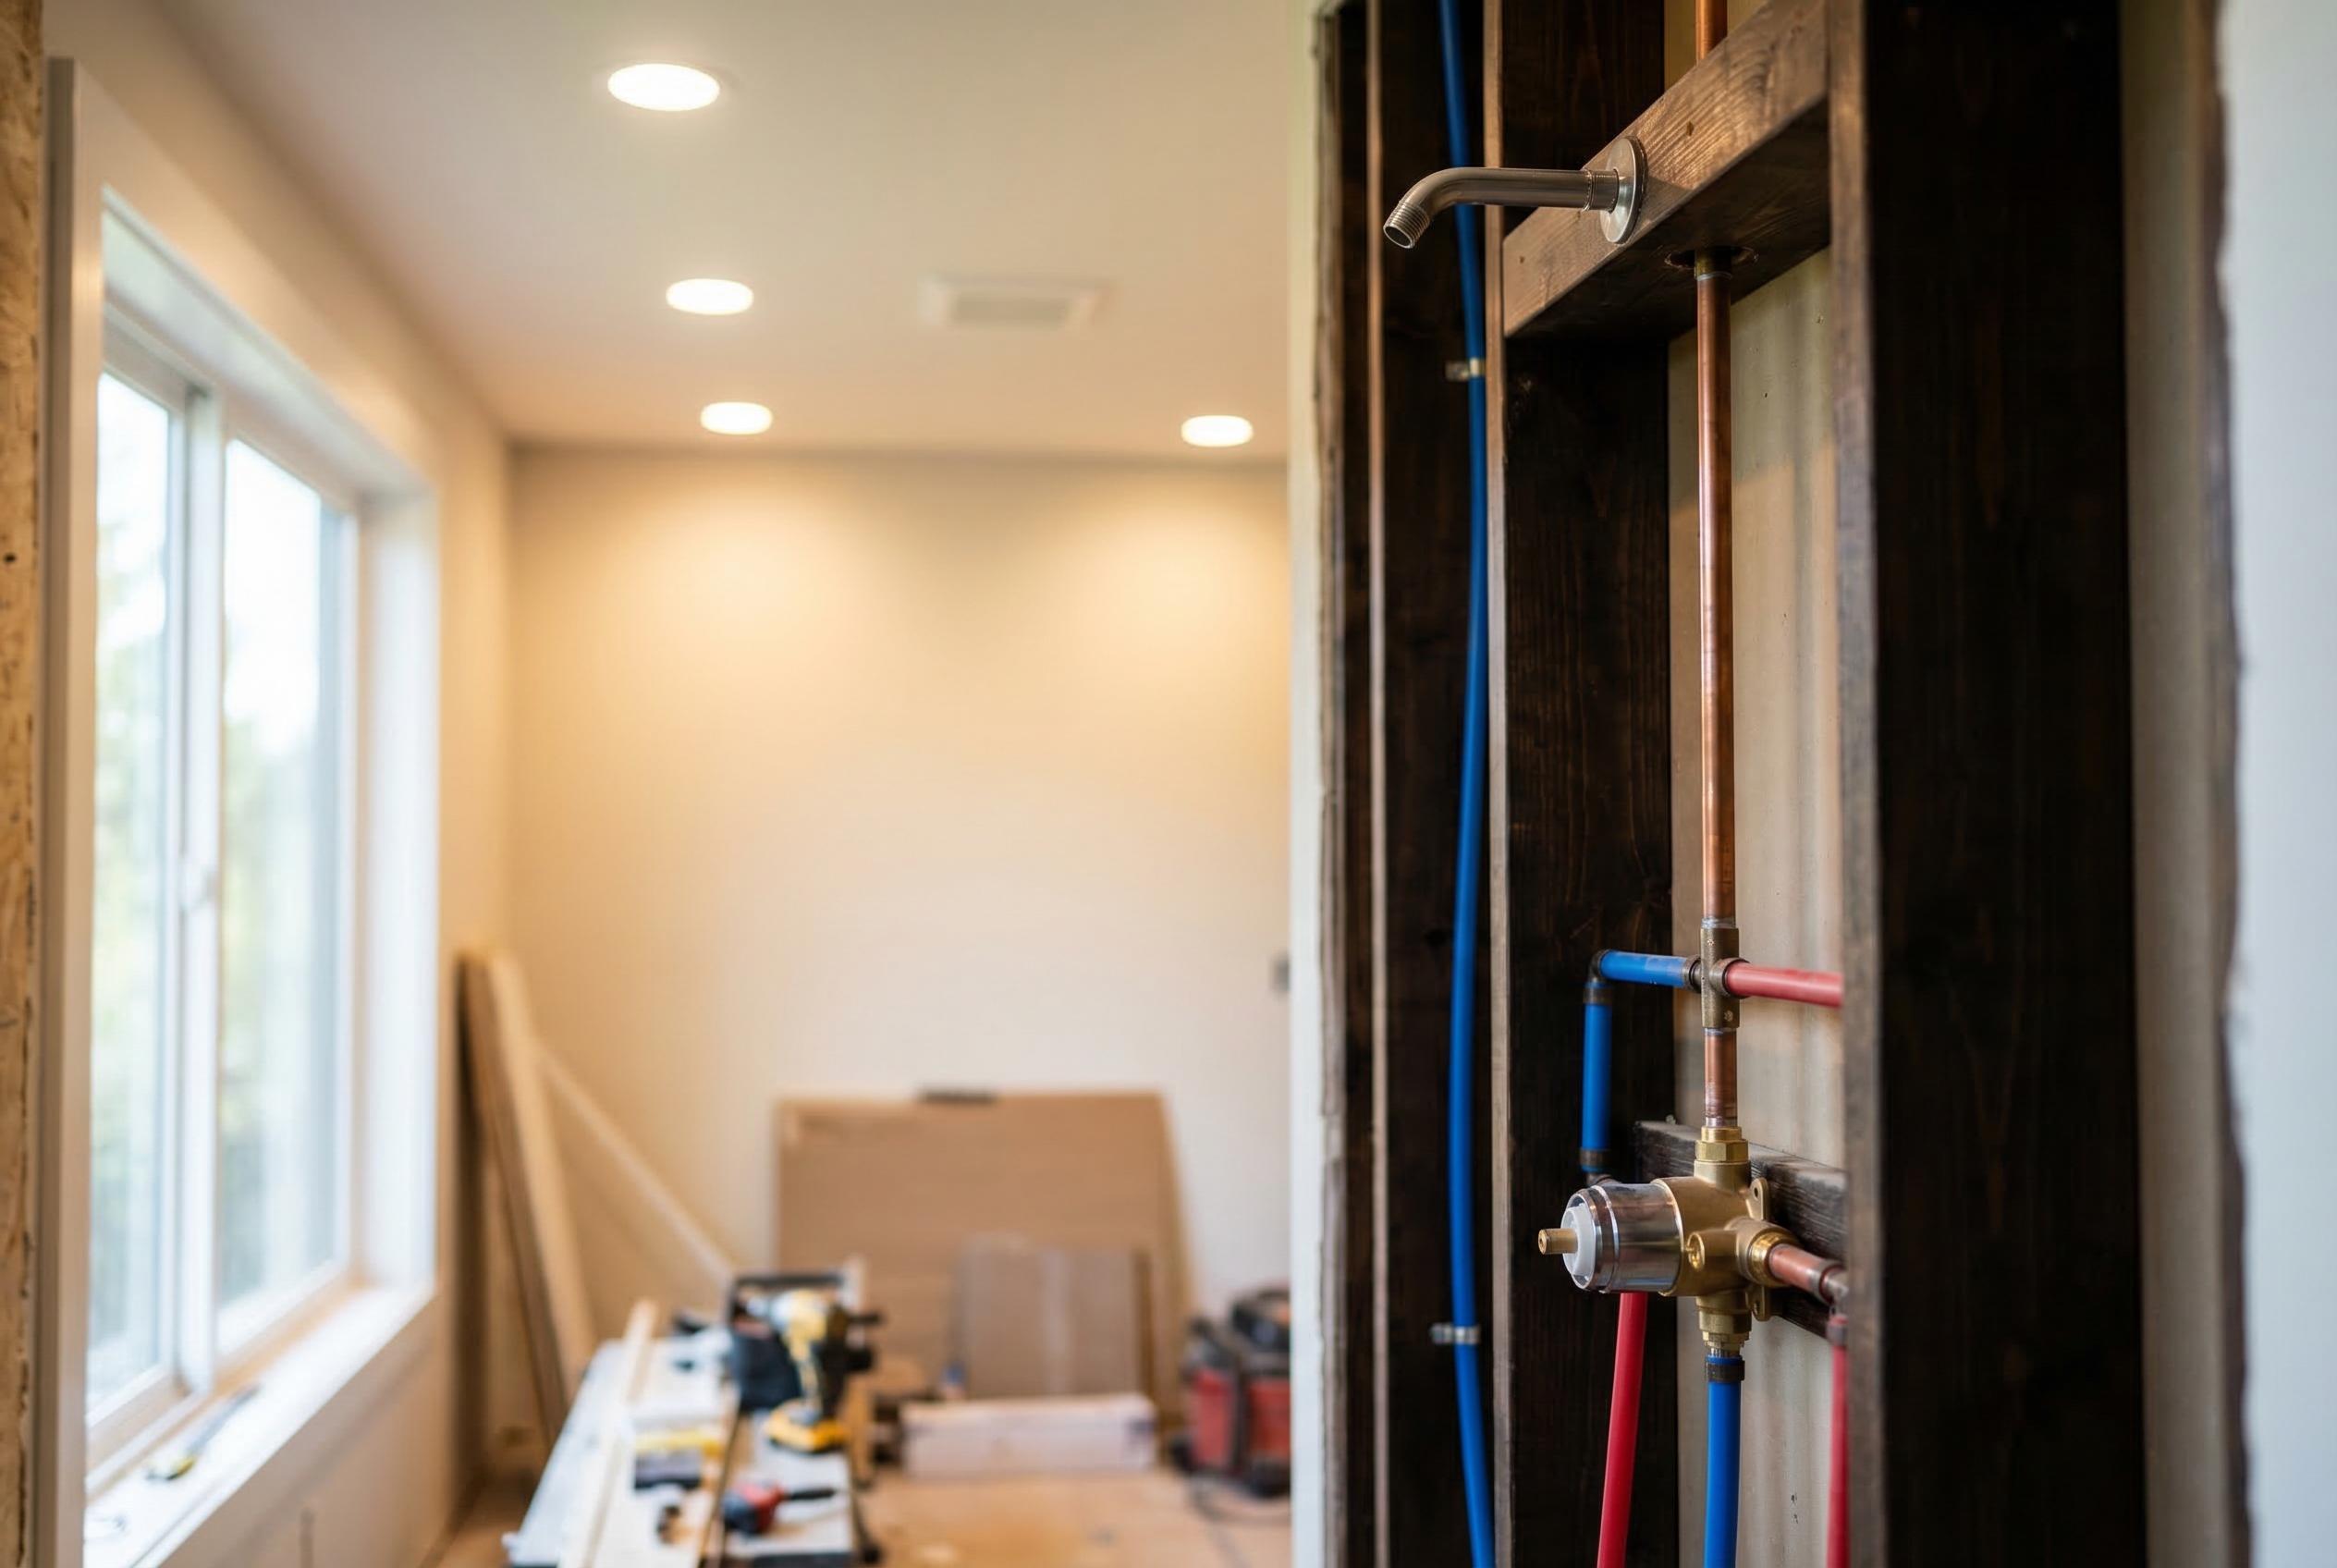
Plumbing (Days 2-3) The tub drain needs to move. Tub drains sit near the back wall, but a shower drain goes in the center (for a standard drain) or along one edge (for a linear drain). I relocate the drain, install a new shower valve at the right height, add supply lines for any additional fixtures (rain head, handheld, body jets), and connect everything to the existing water supply and waste lines. This phase includes a rough-in inspection from the city.
For curbless showers, we notch the floor joists to recess the drain below the subfloor level and create the proper slope. This requires a structural check and sometimes sistering the joists for support.
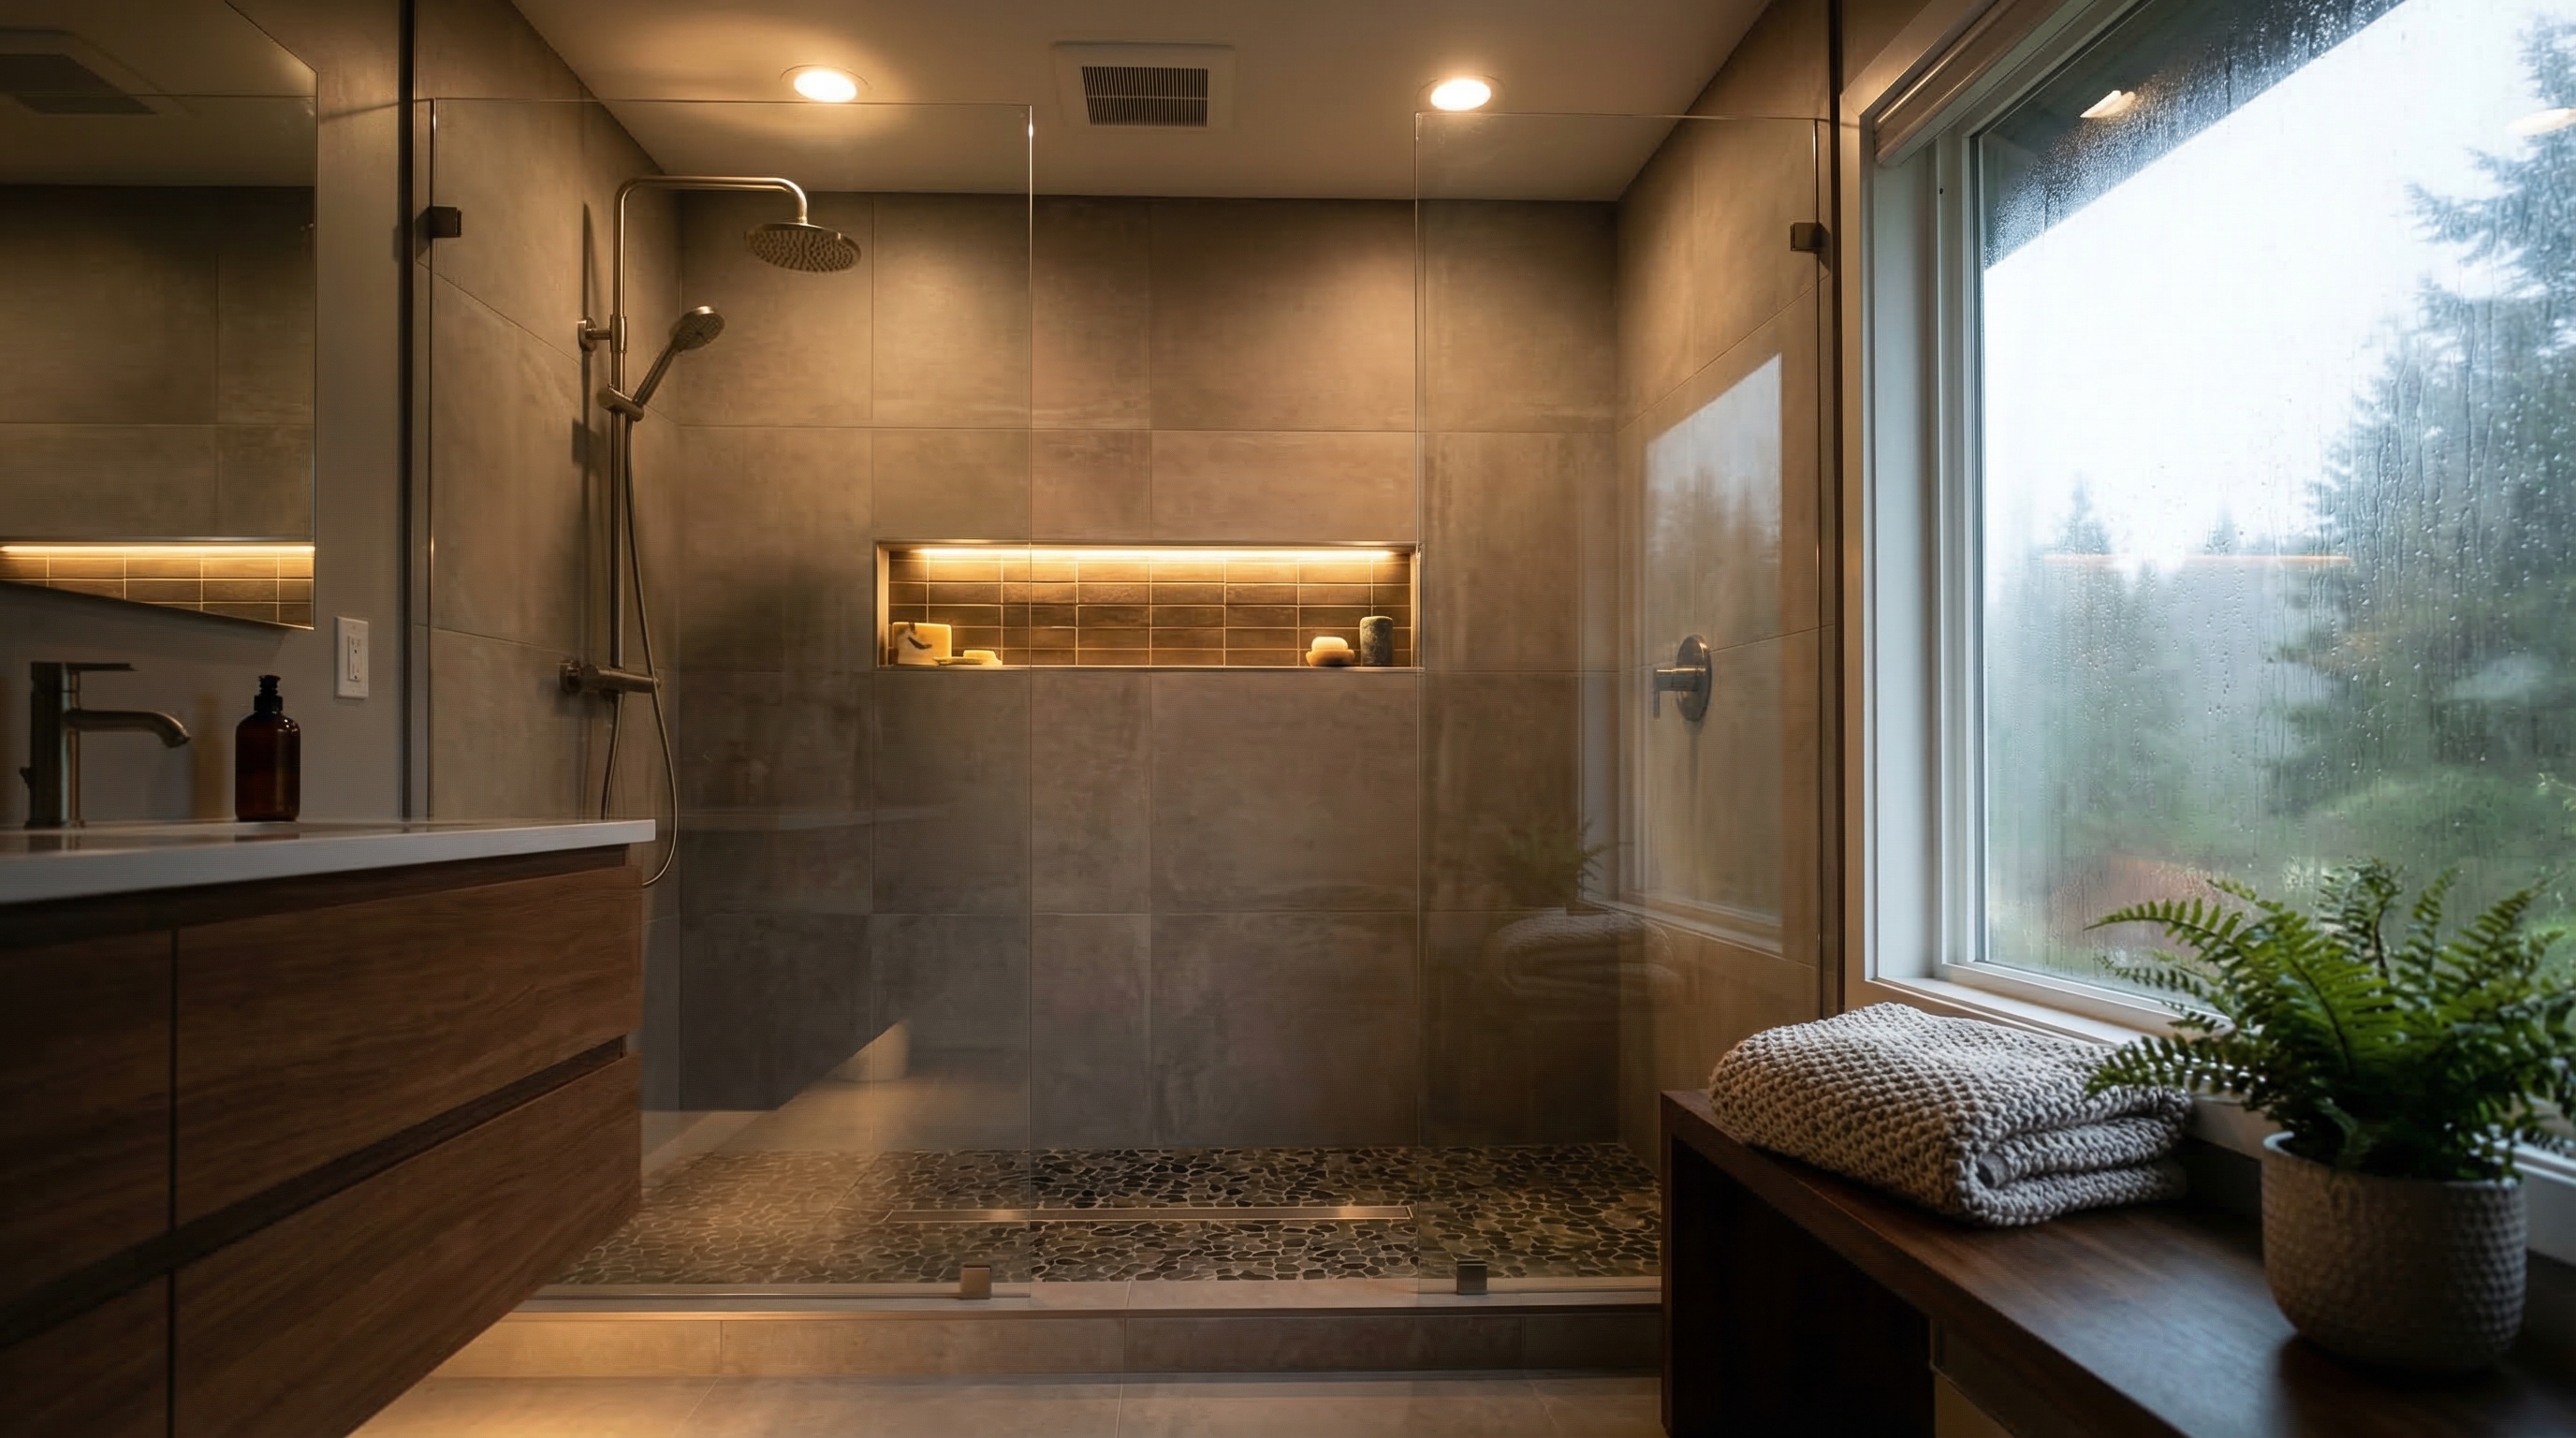
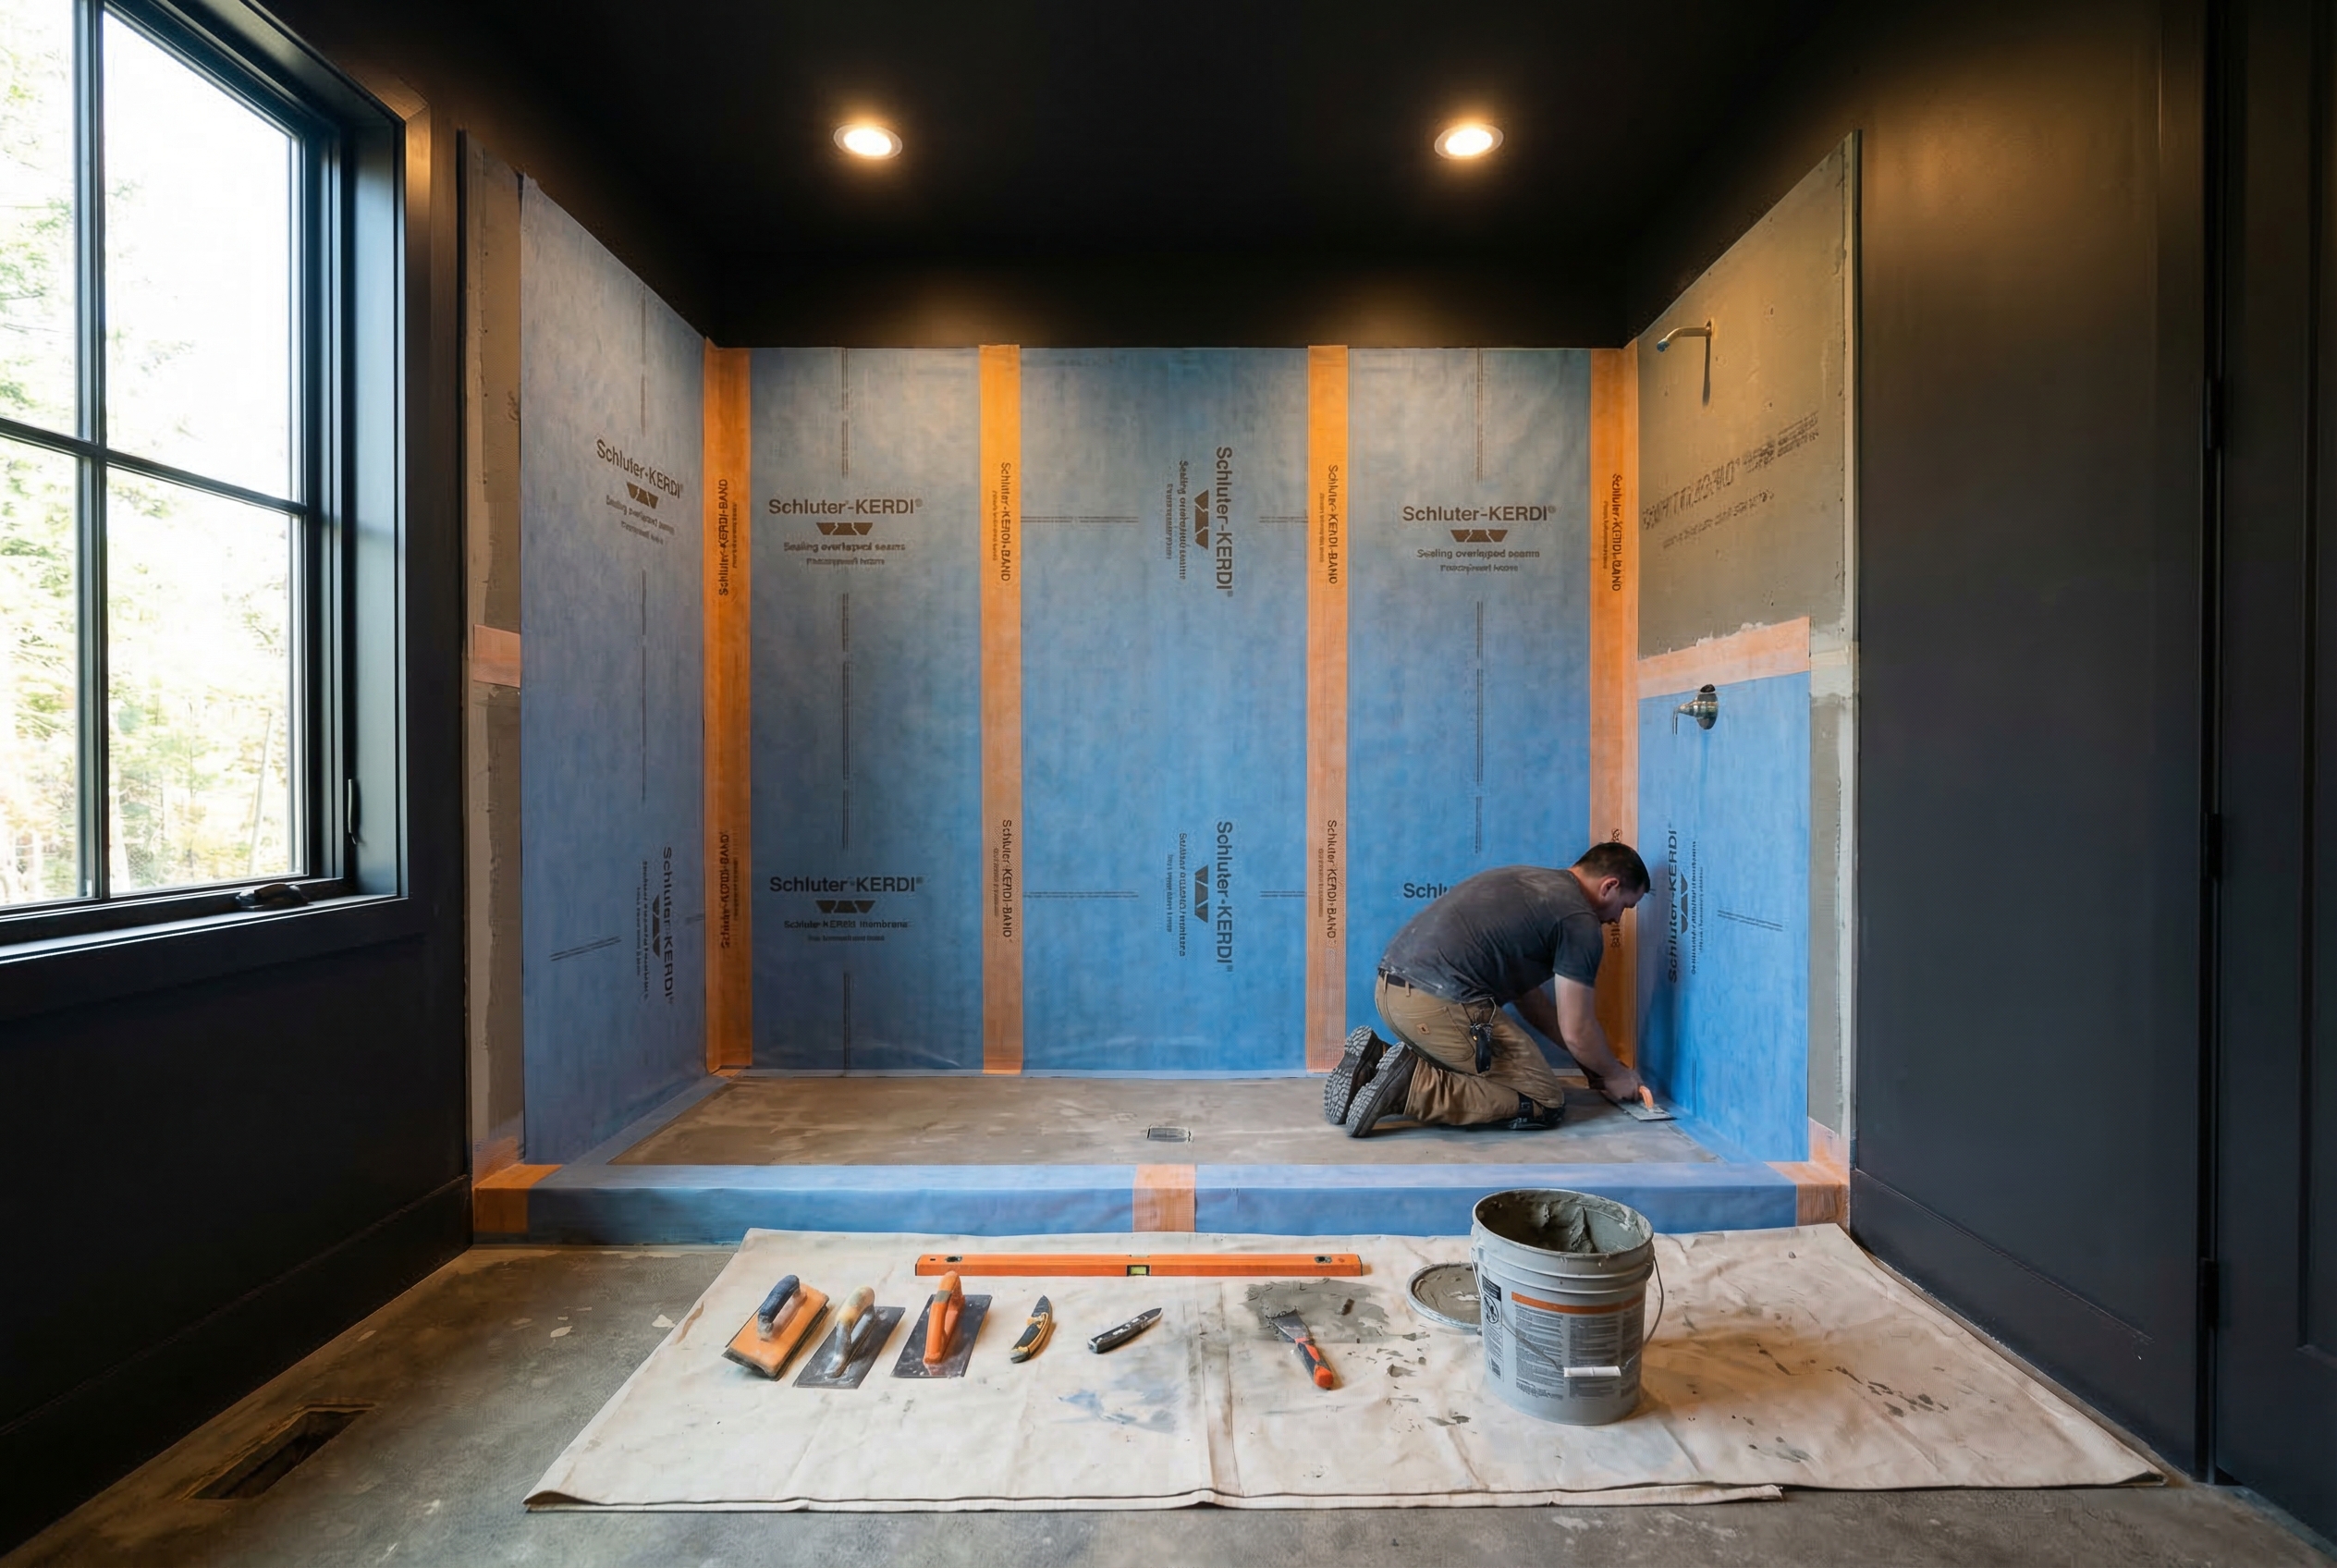
Waterproofing (Day 3) This is the step that separates a shower that lasts 20 years from one that grows mold behind the walls in 3. I use either Schluter KERDI membrane or RedGard liquid waterproofing on every surface: walls, floor, curb, and niches. Every seam is sealed. Every corner gets a preformed waterproofing corner piece. Every screw penetration gets sealed. I don’t rush this step and I don’t cut corners on it. Water damage behind a shower wall is a $5,000-$10,000 fix. Waterproofing done right on day 3 prevents that for the life of the shower.
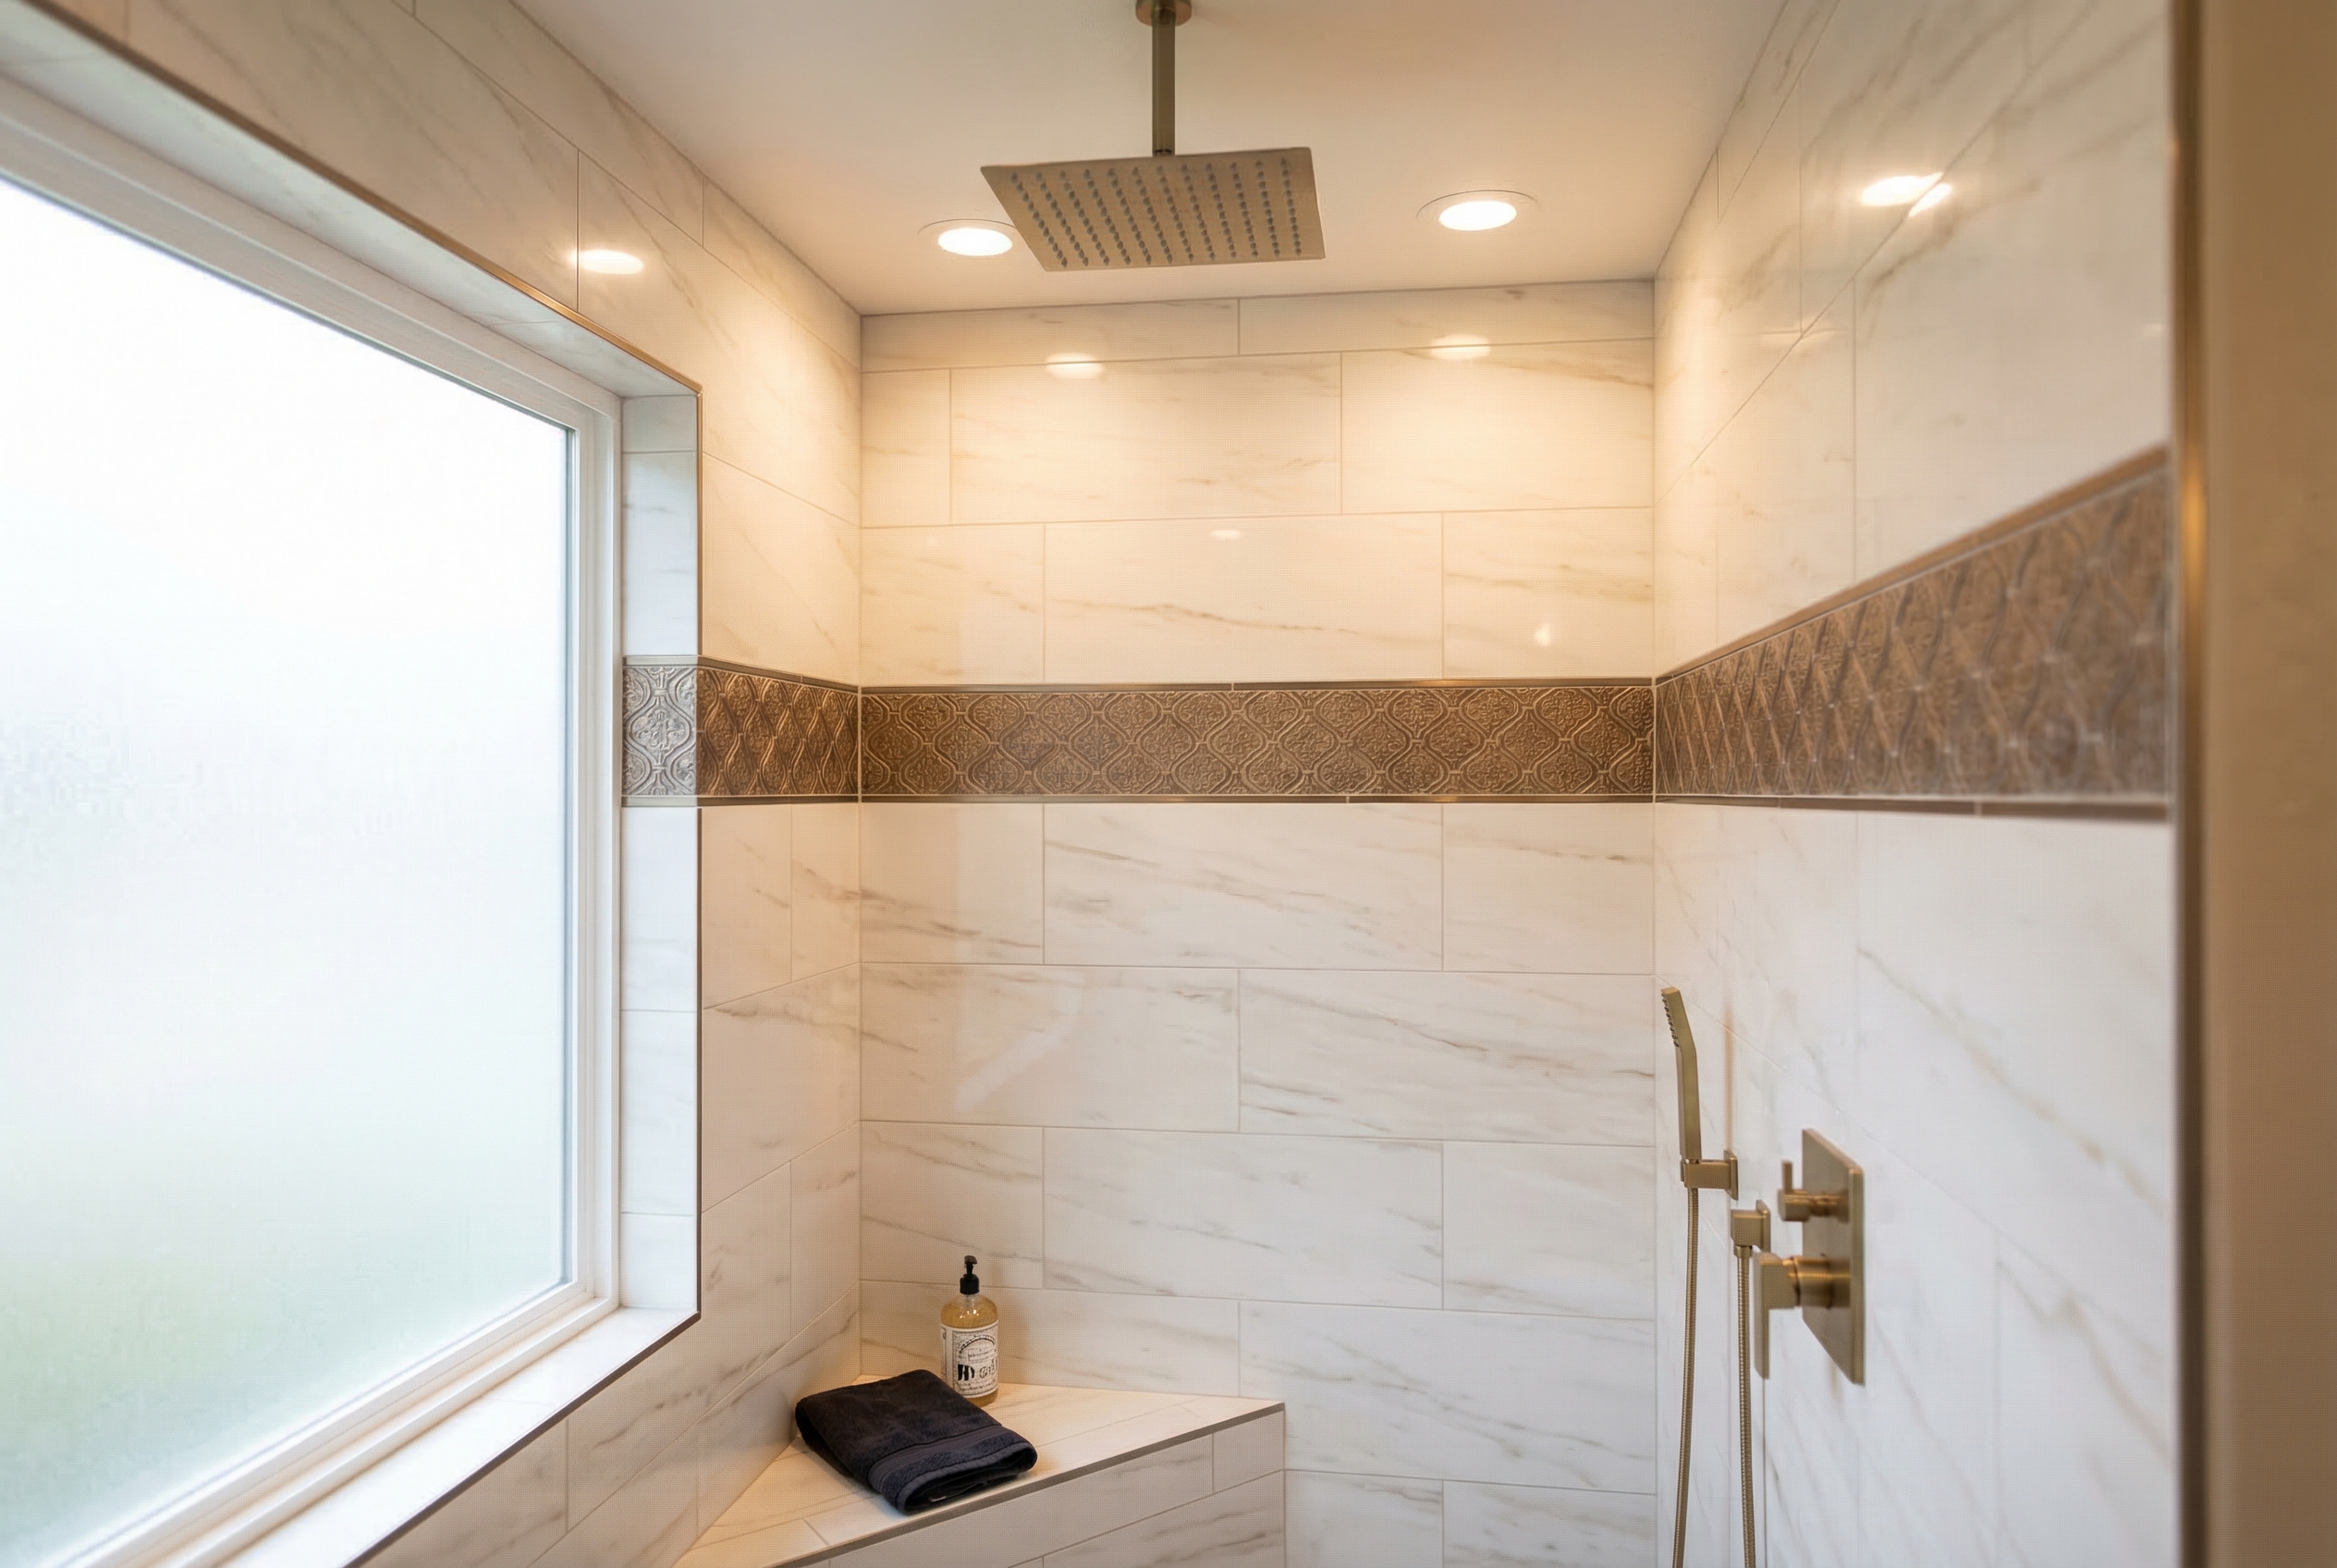
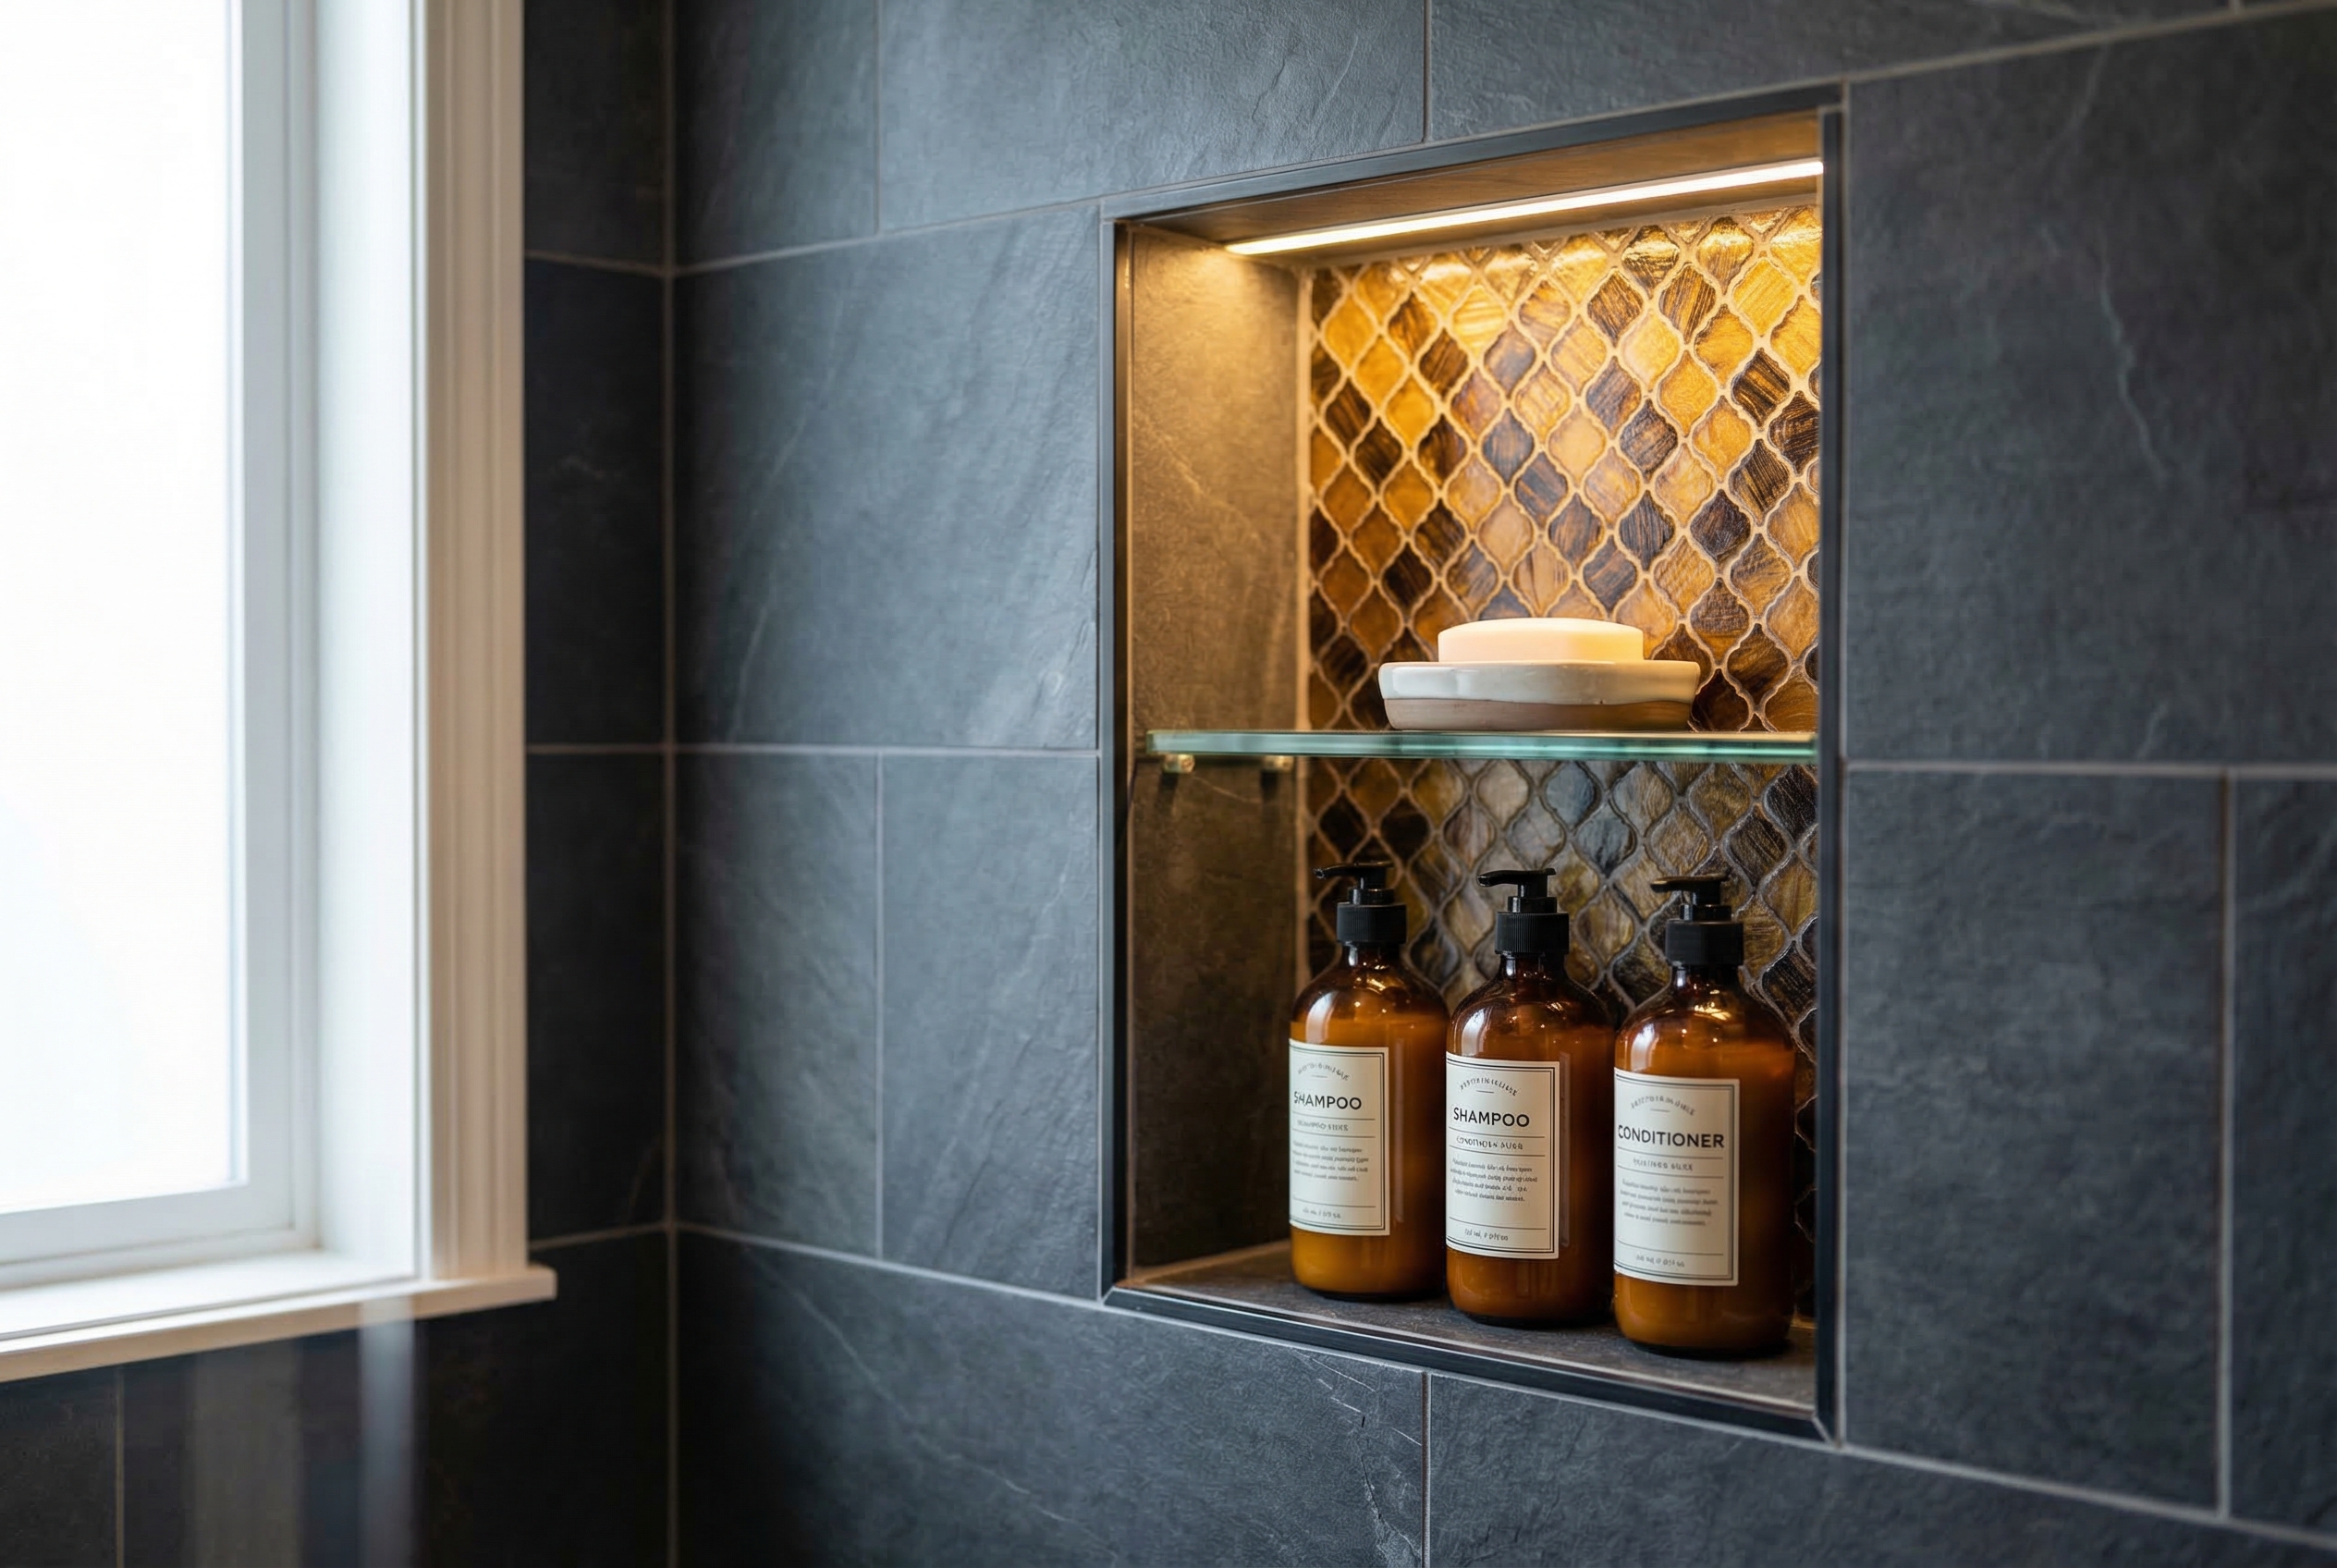
Tile (Days 4-7) Floor tile goes down first with proper slope toward the drain (1/4 inch per foot minimum). Then wall tile, starting from the bottom and working up. Niches get tiled with a slight outward slope so water drains out instead of pooling inside. Bench seats get the same treatment. Accent strips, borders, and patterns are laid out dry first so the spacing looks right before anything gets set in thinset.
I use large-format porcelain for most shower walls because it looks clean and reduces grout lines. Smaller mosaic tile works great on shower floors because the extra grout lines provide better traction. Every tile job gets unsanded grout on walls and sanded grout on floors, color-matched to the tile selection.
Grout and Cure (Day 8) Final grouting, cleanup, and caulking at all change-of-plane joints (where the wall meets the floor, where the wall meets the ceiling, and inside corners). Silicone caulk at these joints, not grout, because the slight movement between surfaces would crack grout over time. The shower needs 48 hours to cure before the glass goes on.
Glass Installation (Day 9-10) Frameless glass panels and doors are custom-measured after the tile is complete and fabricated to exact dimensions. Fabrication takes 5-7 business days (I schedule this during the tile phase so there’s minimal delay). Installation takes half a day. The result: clean lines, no metal frame collecting soap scum, and an open feel that makes the bathroom look twice its size.
What This Upgrade Actually Costs
I’ll give you the real numbers because I know that’s what you’re looking for.
Standard Tub-to-Shower Conversion: $10,000-$24,000 Porcelain tile on walls and floor, one recessed niche, new shower valve and trim, standard curb, semi-frameless glass door. This covers about 80% of the conversions I do.
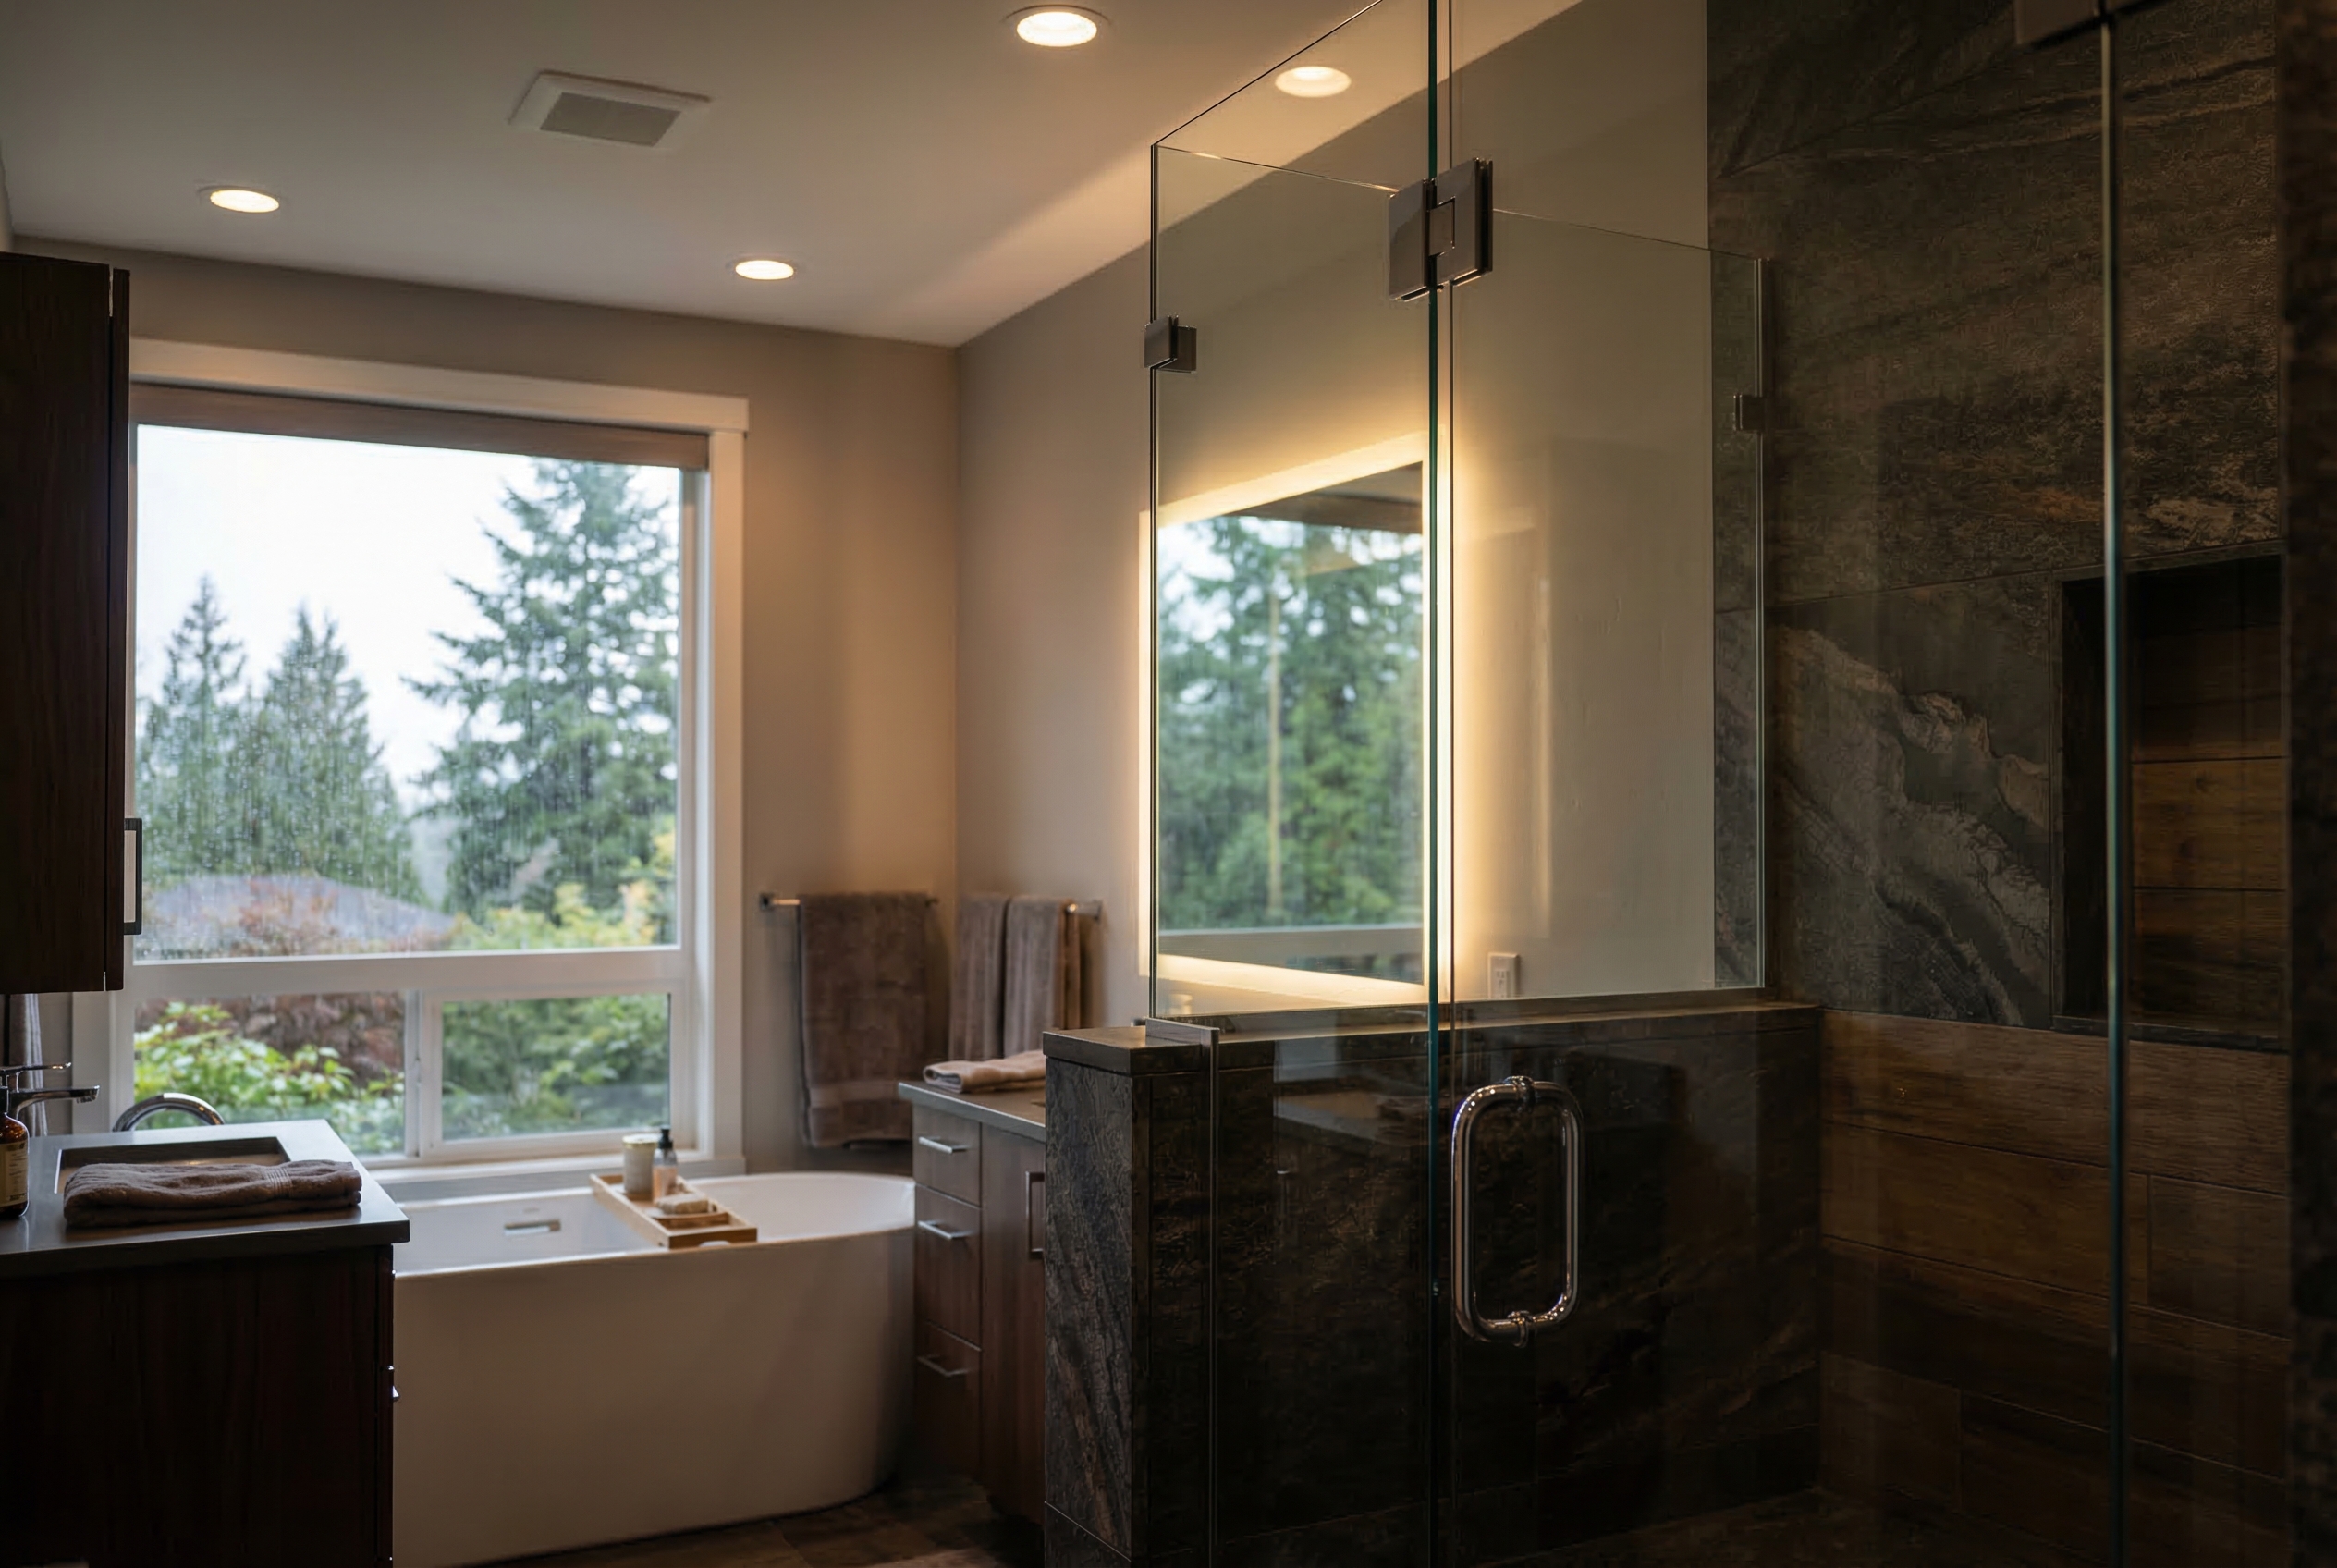
Mid-Range Conversion: $16,000-$29,000 Large-format tile, accent wall or band, two niches, bench seat, rain head with handheld combo, frameless glass enclosure. The sweet spot for homeowners who want it to feel like a spa.
High-End Conversion: $23,000-$40,000+ Natural stone tile, curbless entry with linear drain, body jets, digital shower valve, heated bench, full frameless glass enclosure. This is the full spa treatment, and it requires more complex plumbing and waterproofing.
These prices include everything: demo, plumbing, waterproofing, tile, glass, fixtures, and cleanup. No hidden fees. No surprise change orders. The number I give you is the number you pay.
Why This Is Different From a Bathroom Remodel
A full bathroom remodel touches the entire room: vanity, flooring, lighting, paint, sometimes layout changes. A tub-to-shower conversion focuses specifically on replacing the tub/shower area. It’s a faster project (1-2 weeks versus 3-5 weeks for a full remodel), a lower price point, and a targeted upgrade that delivers the biggest visual and functional change per dollar spent.
If your vanity, flooring, and fixtures are in decent shape but the tub feels dated, a conversion is the smart move. If everything in the bathroom needs updating, a full remodel makes more sense. I’ll give you my honest recommendation during the free consultation.
Accessibility and Aging-in-Place
More homeowners are asking about curbless showers, and not just for the modern look. A zero-threshold entry means no step to trip over. A bench seat means you can sit while showering. Grab bars can be installed in the framing during construction so they’re structural, not just screwed into drywall.
I’ve built dozens of accessible showers for homeowners in their 50s and 60s who are planning ahead. It’s one of the smartest investments you can make. The cost difference between a standard curbed shower and a curbless one is only $1,000-$2,000, and it keeps you in your home safely for years longer.
Ready to replace that unused tub? Call me at (253) 392-9266 or request a free estimate. I’ll look at your bathroom, discuss your options, and give you a fixed-price quote.