Kitchen demolition what to expect comes down to this: 1 to 5 days of controlled destruction, $1,000 to $8,500 in costs depending on your scope, and at least one surprise hiding behind the walls of any Pierce County home built before 1980. I say “controlled” because good demo isn’t about swinging a sledgehammer and hoping for the best. It’s a careful sequence of disconnects, removals, inspections, and disposal that sets the stage for everything that comes after.
I’m Brad Zemke, owner of Pacific Remodeling in Puyallup, WA. Third-generation carpenter, Air Force veteran, 20+ years in the trades. I’ve gutted kitchens in homes from the 1940s through new construction across Puyallup, South Hill, Tacoma, Sumner, and Bonney Lake since starting this business in 2018. Demo day is where every remodel gets real. Here’s exactly what happens, what it costs, and what catches homeowners off guard.
How Much Does Kitchen Demolition Cost in Pierce County?
Let me give you the numbers first. These reflect what I’m quoting and building in Pierce County right now. PNW labor runs 10-15% above national averages because licensed contractors in Washington carry L&I insurance, which adds real overhead.
| Demolition Scope | Pierce County Cost | Timeline |
|---|---|---|
| Partial demo (cabinets + countertops only) | $1,000 - $3,000 | 1 - 2 days |
| Full kitchen gut (everything down to studs) | $3,000 - $8,500 | 2 - 4 days |
| Full gut + hazmat abatement (asbestos/lead) | $6,000 - $18,000 | 1 - 3 weeks |
| Add structural wall removal (load-bearing) | $3,000 - $10,000 | 2 - 5 extra days |
| Add non-load-bearing wall removal | $600 - $2,000 | 1 extra day |
If your home was built before 1980 in Puyallup, Spanaway, Lakewood, or Tacoma, budget an extra $300-$800 for hazardous material testing before any demo work starts. I require this on every pre-1980 project. It’s not optional.
A few things that affect where you land in these ranges:
- Kitchen size. A 100-square-foot galley kitchen demos faster and cheaper than a 250-square-foot open layout.
- Number of layers. I’ve pulled up five layers of flooring in a single Lakewood ranch. Each layer adds time.
- Appliance count. Disconnecting a gas range requires a licensed plumber in Washington. That’s a separate cost of $75 to $200.
- Dumpster size. A partial demo might fill half a 10-yard container ($400-$475). A full gut with drywall and flooring fills a 15 to 20-yard container ($450-$600).
For a full breakdown of total project costs including demo, check my kitchen remodel cost guide for Puyallup.
What Happens on Kitchen Demolition Day, Step by Step
This is the part most homeowners don’t see on TV. HGTV compresses 3 days of careful work into a 45-second montage with upbeat music. Real demo follows a specific sequence, and skipping steps causes expensive problems.
Step 1: Utility Shut-Offs and Disconnects
Before anything gets torn out, I shut off:
- Water supply at the shut-off valves under the sink (and at the main if the valves are corroded or unreliable)
- Electrical circuits for the kitchen at the breaker panel (I label every circuit before flipping anything)
- Gas supply if you have a gas range or cooktop (licensed plumber caps the line, $75-$200)
This takes 30 minutes to an hour. It’s not exciting, but it prevents flooding, electrical shock, and gas leaks. I’ve walked onto jobs where another contractor’s crew started ripping out cabinets with live wires still connected to the garbage disposal. That’s how people get hurt.
Step 2: Appliance Removal
Everything comes out. Fridge, range, dishwasher, microwave, range hood. I disconnect each one and move them to the garage or driveway.
If your appliances still work and you’re replacing them, you have options:
- Donate to Habitat for Humanity ReStore in Tacoma (2820 Center St). They pick up for free in Pierce County.
- Sell on Facebook Marketplace. A working stainless fridge pulls $200 to $600 depending on age and brand.
- Haul to recycling. Tacoma Metal Recycling handles appliance recycling, but refrigerators require certified refrigerant recovery before disposal. That’s federal law.
Step 3: Upper Cabinets Come Down First
I always remove uppers before lowers. Working overhead near unsupported lower cabinets is a safety risk, and you need clear floor space to set uppers down safely.
Solid wood cabinets in good shape? Worth saving. I’ve pulled 1960s face-frame cabinets out of Sumner homes that sold for $150 to $300 per linear foot on the vintage market. Particleboard cabinets from the 1990s and 2000s? Not worth the time. They come out in pieces.
Step 4: Countertops and Lower Cabinets
Countertops come off the lowers first. If you have granite or quartz, this requires at least two people. Those slabs weigh 15 to 20 pounds per square foot. A standard 25-square-foot countertop is 375 to 500 pounds.
Laminate countertops are simpler. A few screws from below, a utility knife along the backsplash caulk, and they lift right off.
Then the lower cabinets come out. I check the wall behind every cabinet for moisture damage, mold, and pest evidence. This is the first real look at what’s been hiding.
Step 5: Flooring Removal
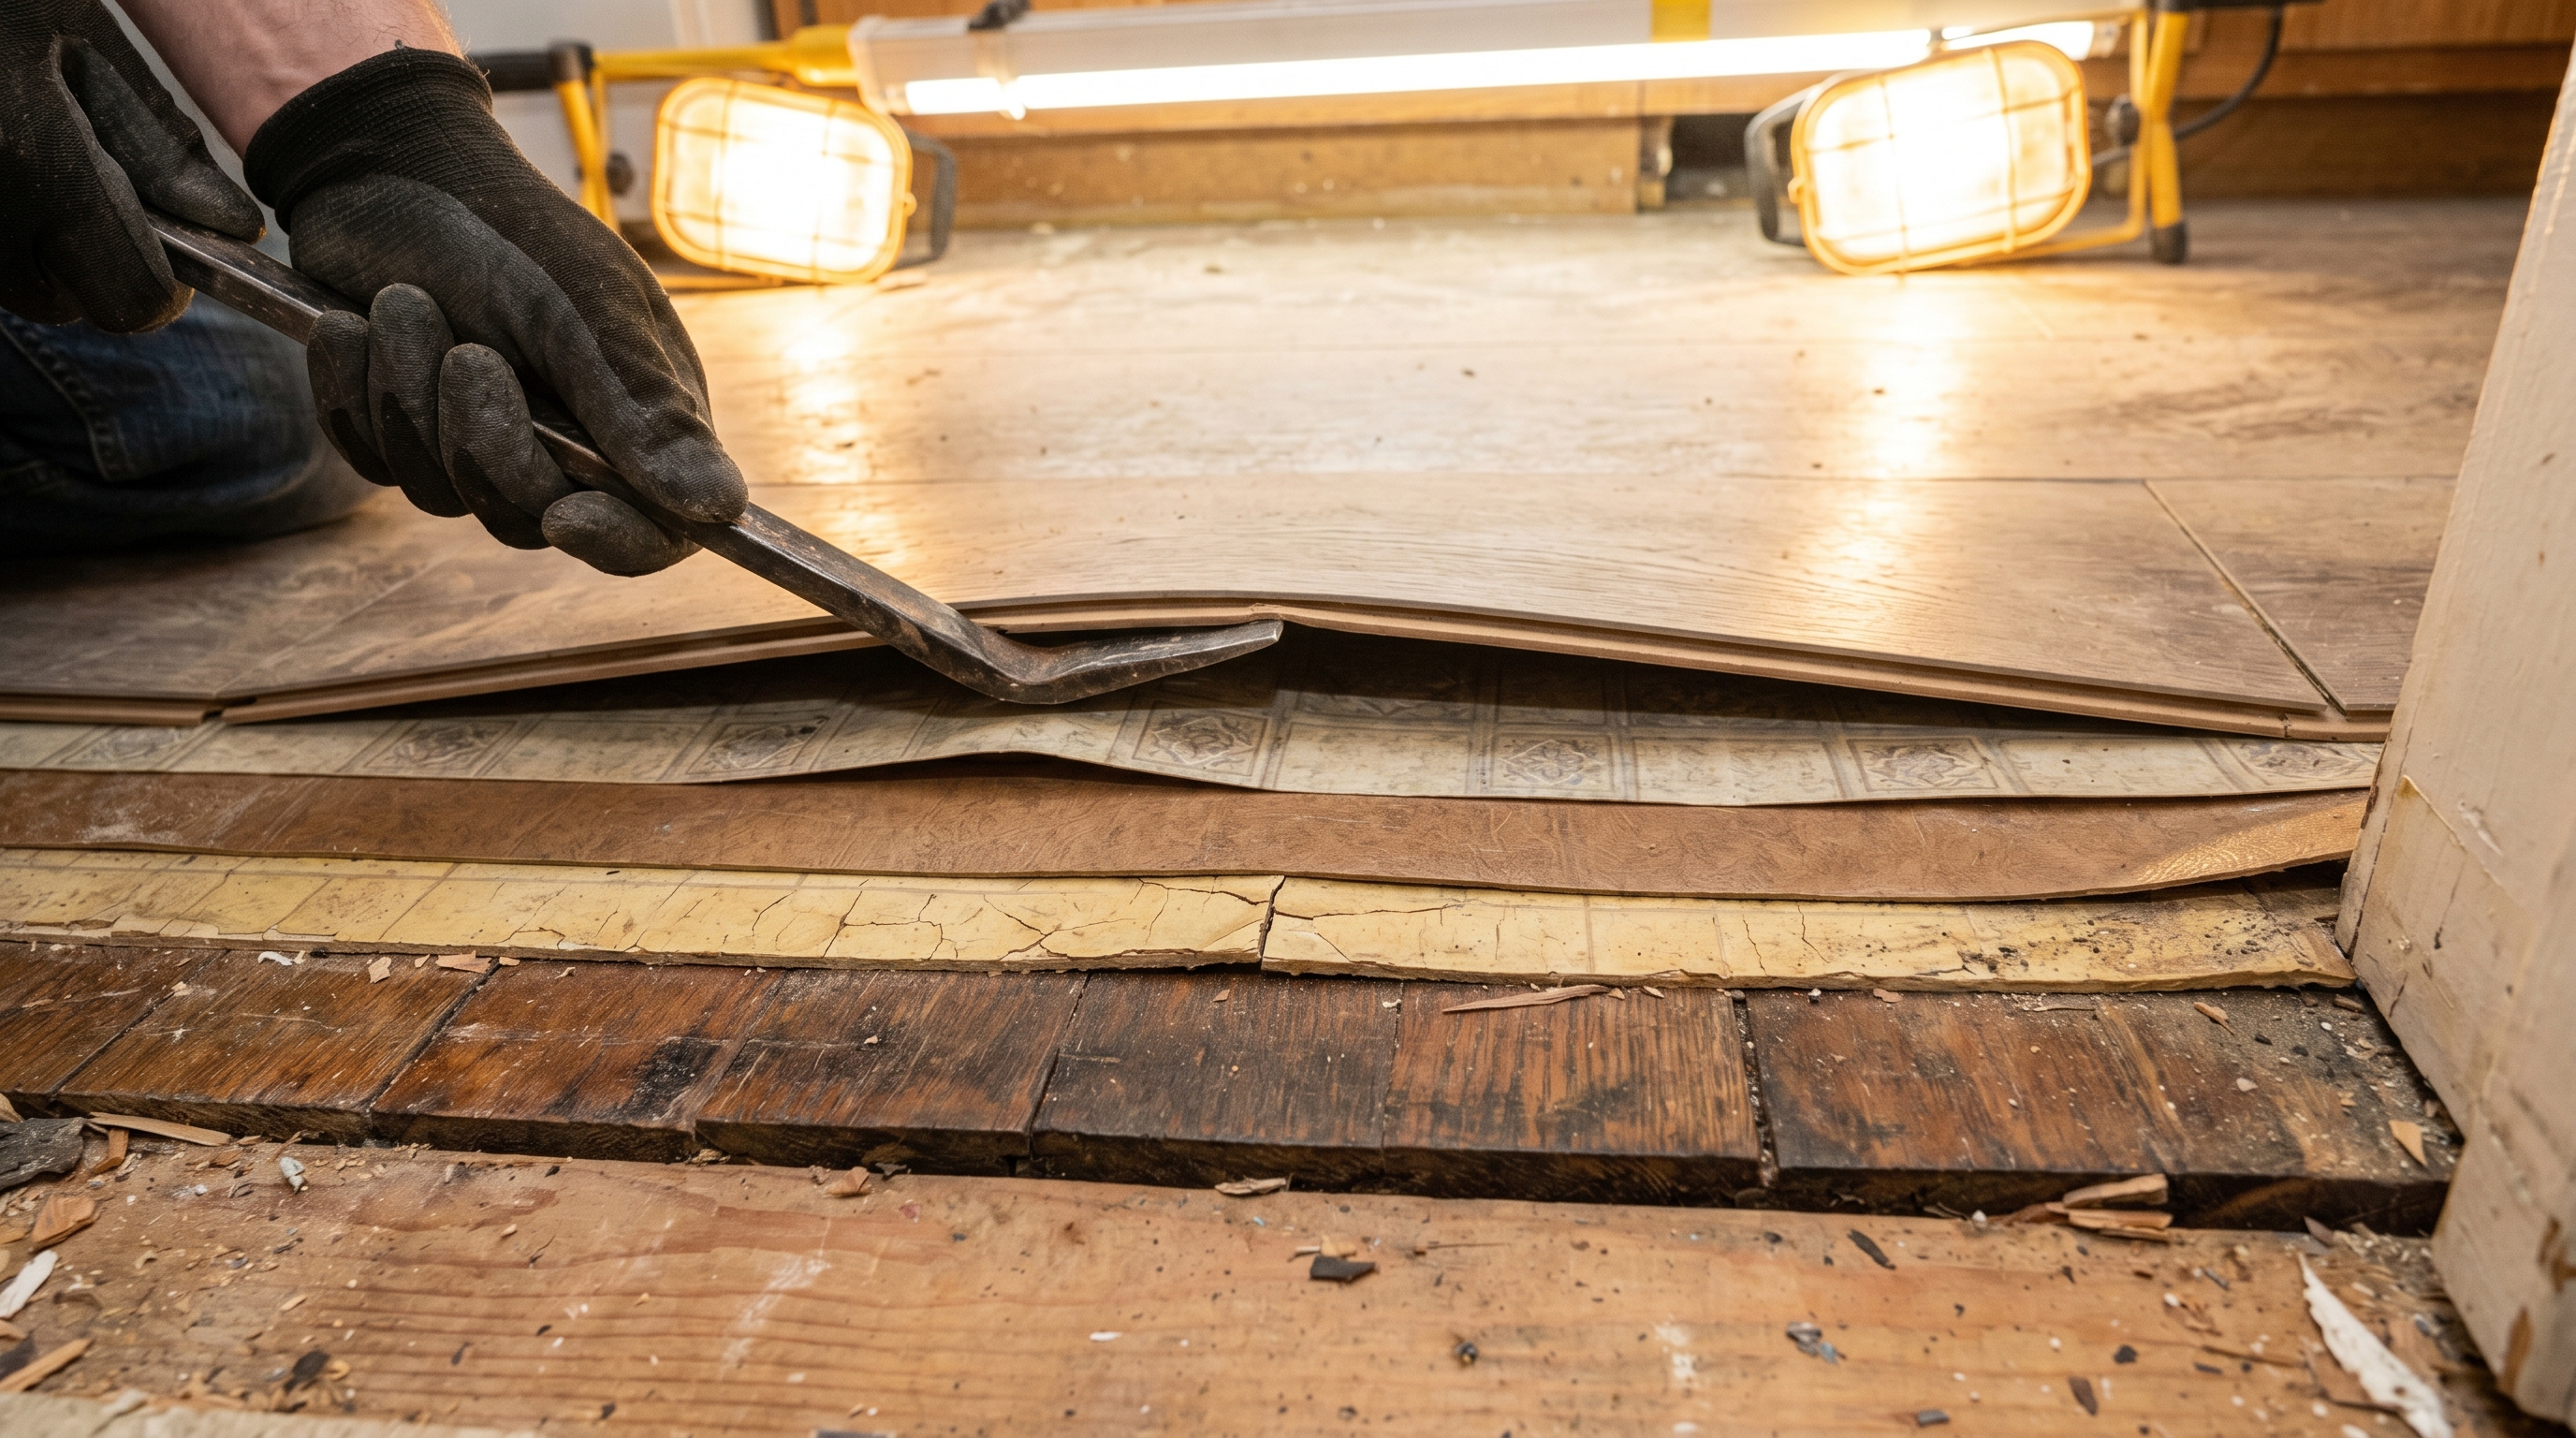
After cabinets are out, the floor gets pulled. This is where things get interesting in older Pierce County homes.
I’ve found as many as five layers stacked on top of each other in a single kitchen: original hardwood, then linoleum, then vinyl sheet, then another layer of vinyl, then a floating laminate click-lock on top. Each layer adds removal time and disposal weight.
If your home was built before 1980, do not pull up 9”x9” vinyl tiles without testing for asbestos first. Those tiles almost certainly contain asbestos. Disturbing them without proper containment is illegal in Washington and dangerous. I’ve seen homeowners and contractors make this mistake, and the cleanup cost dwarfs the original demo budget.
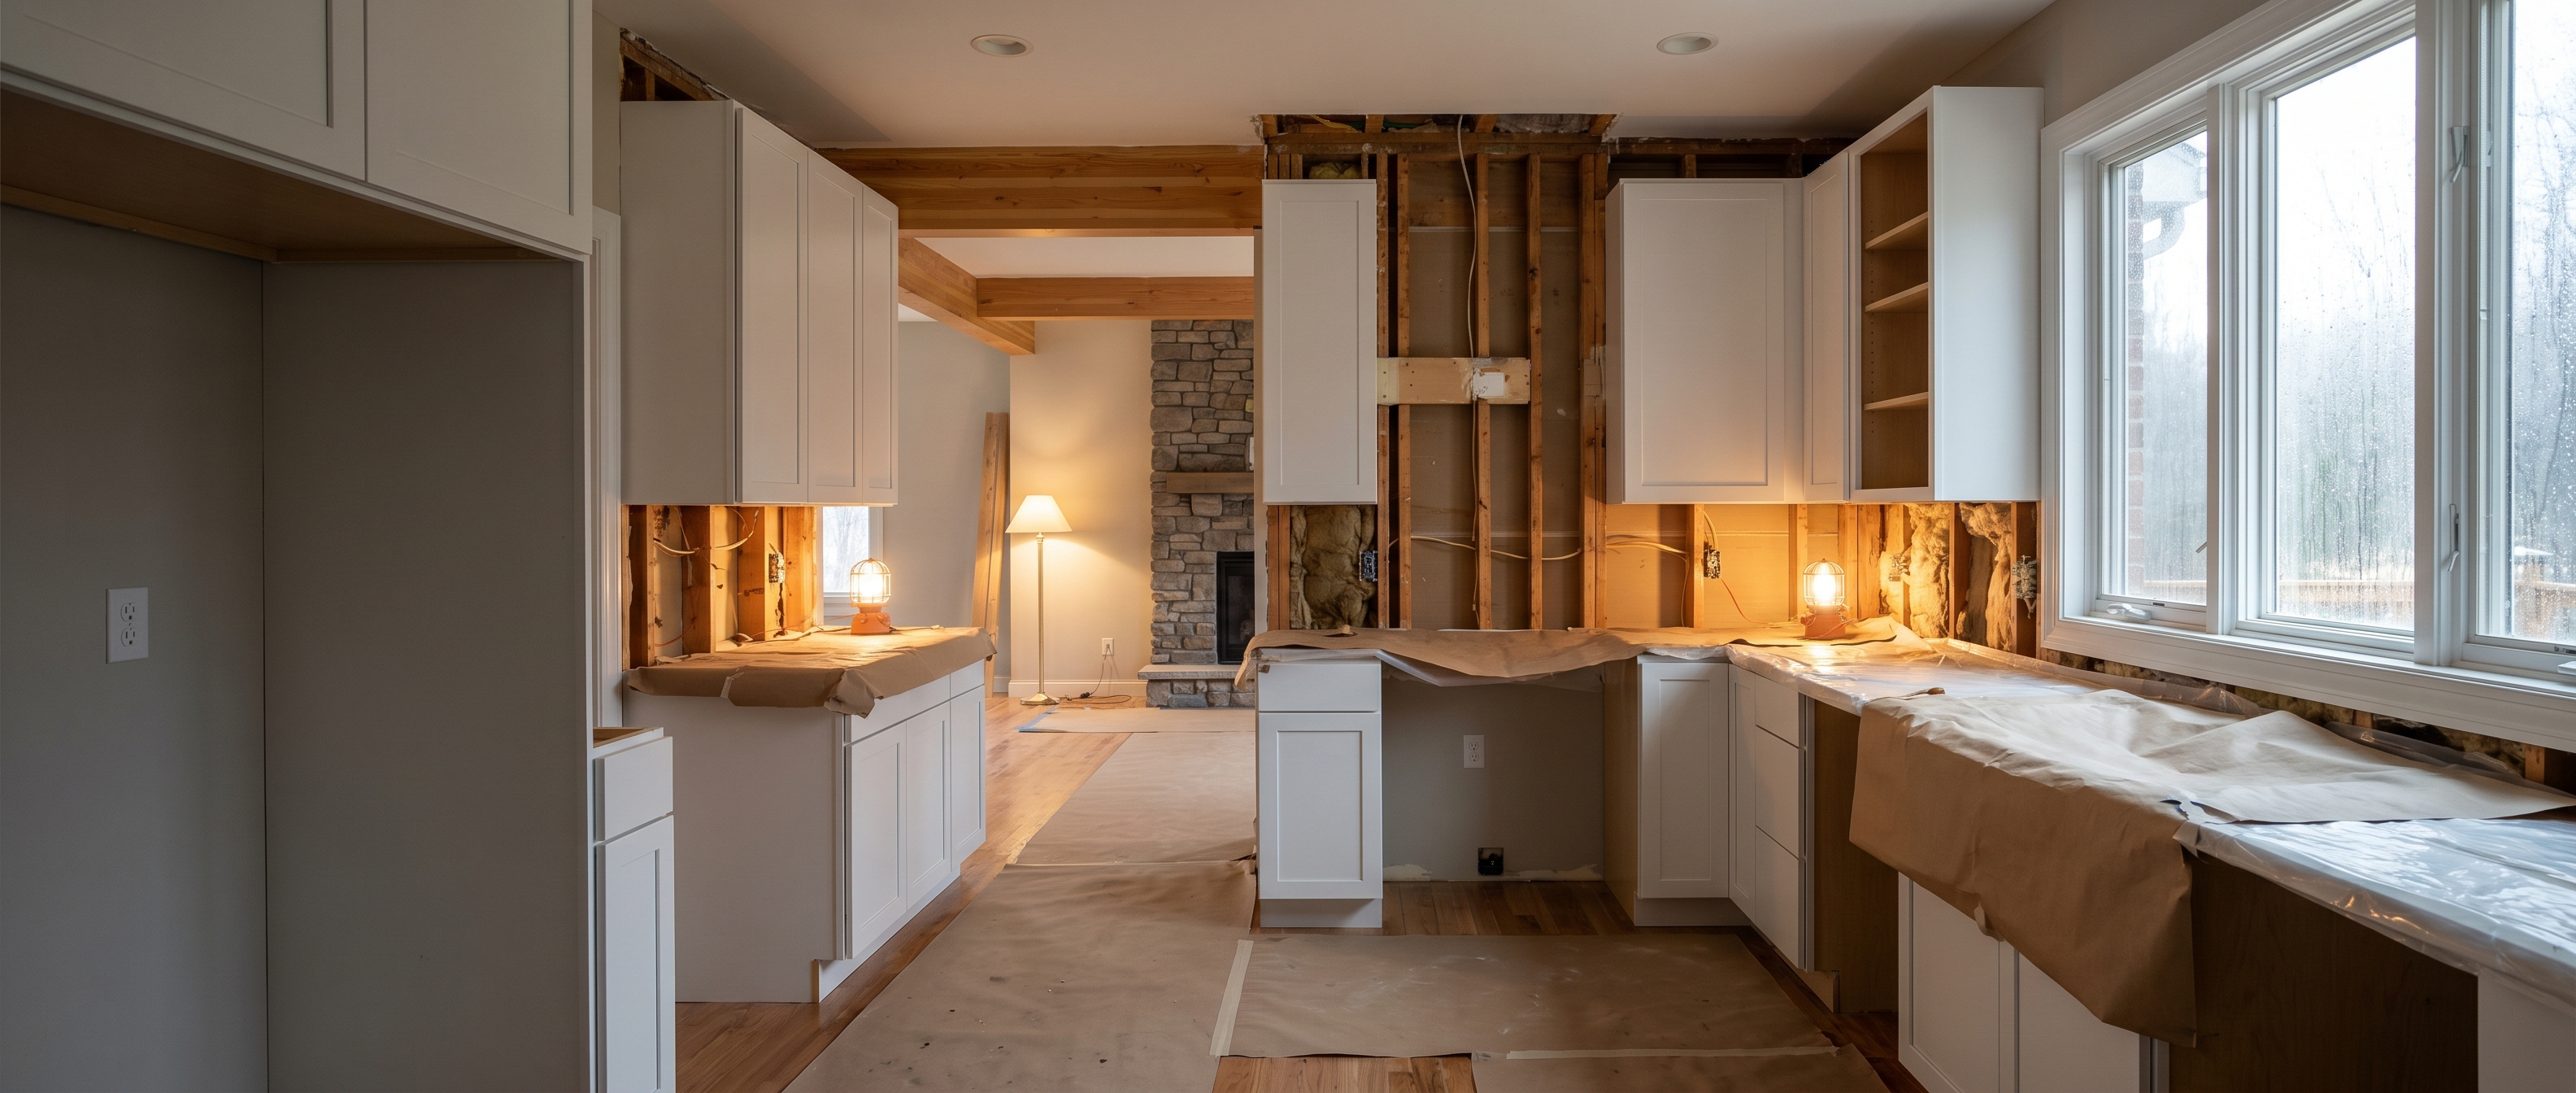
Step 6: Drywall and Wall Removal
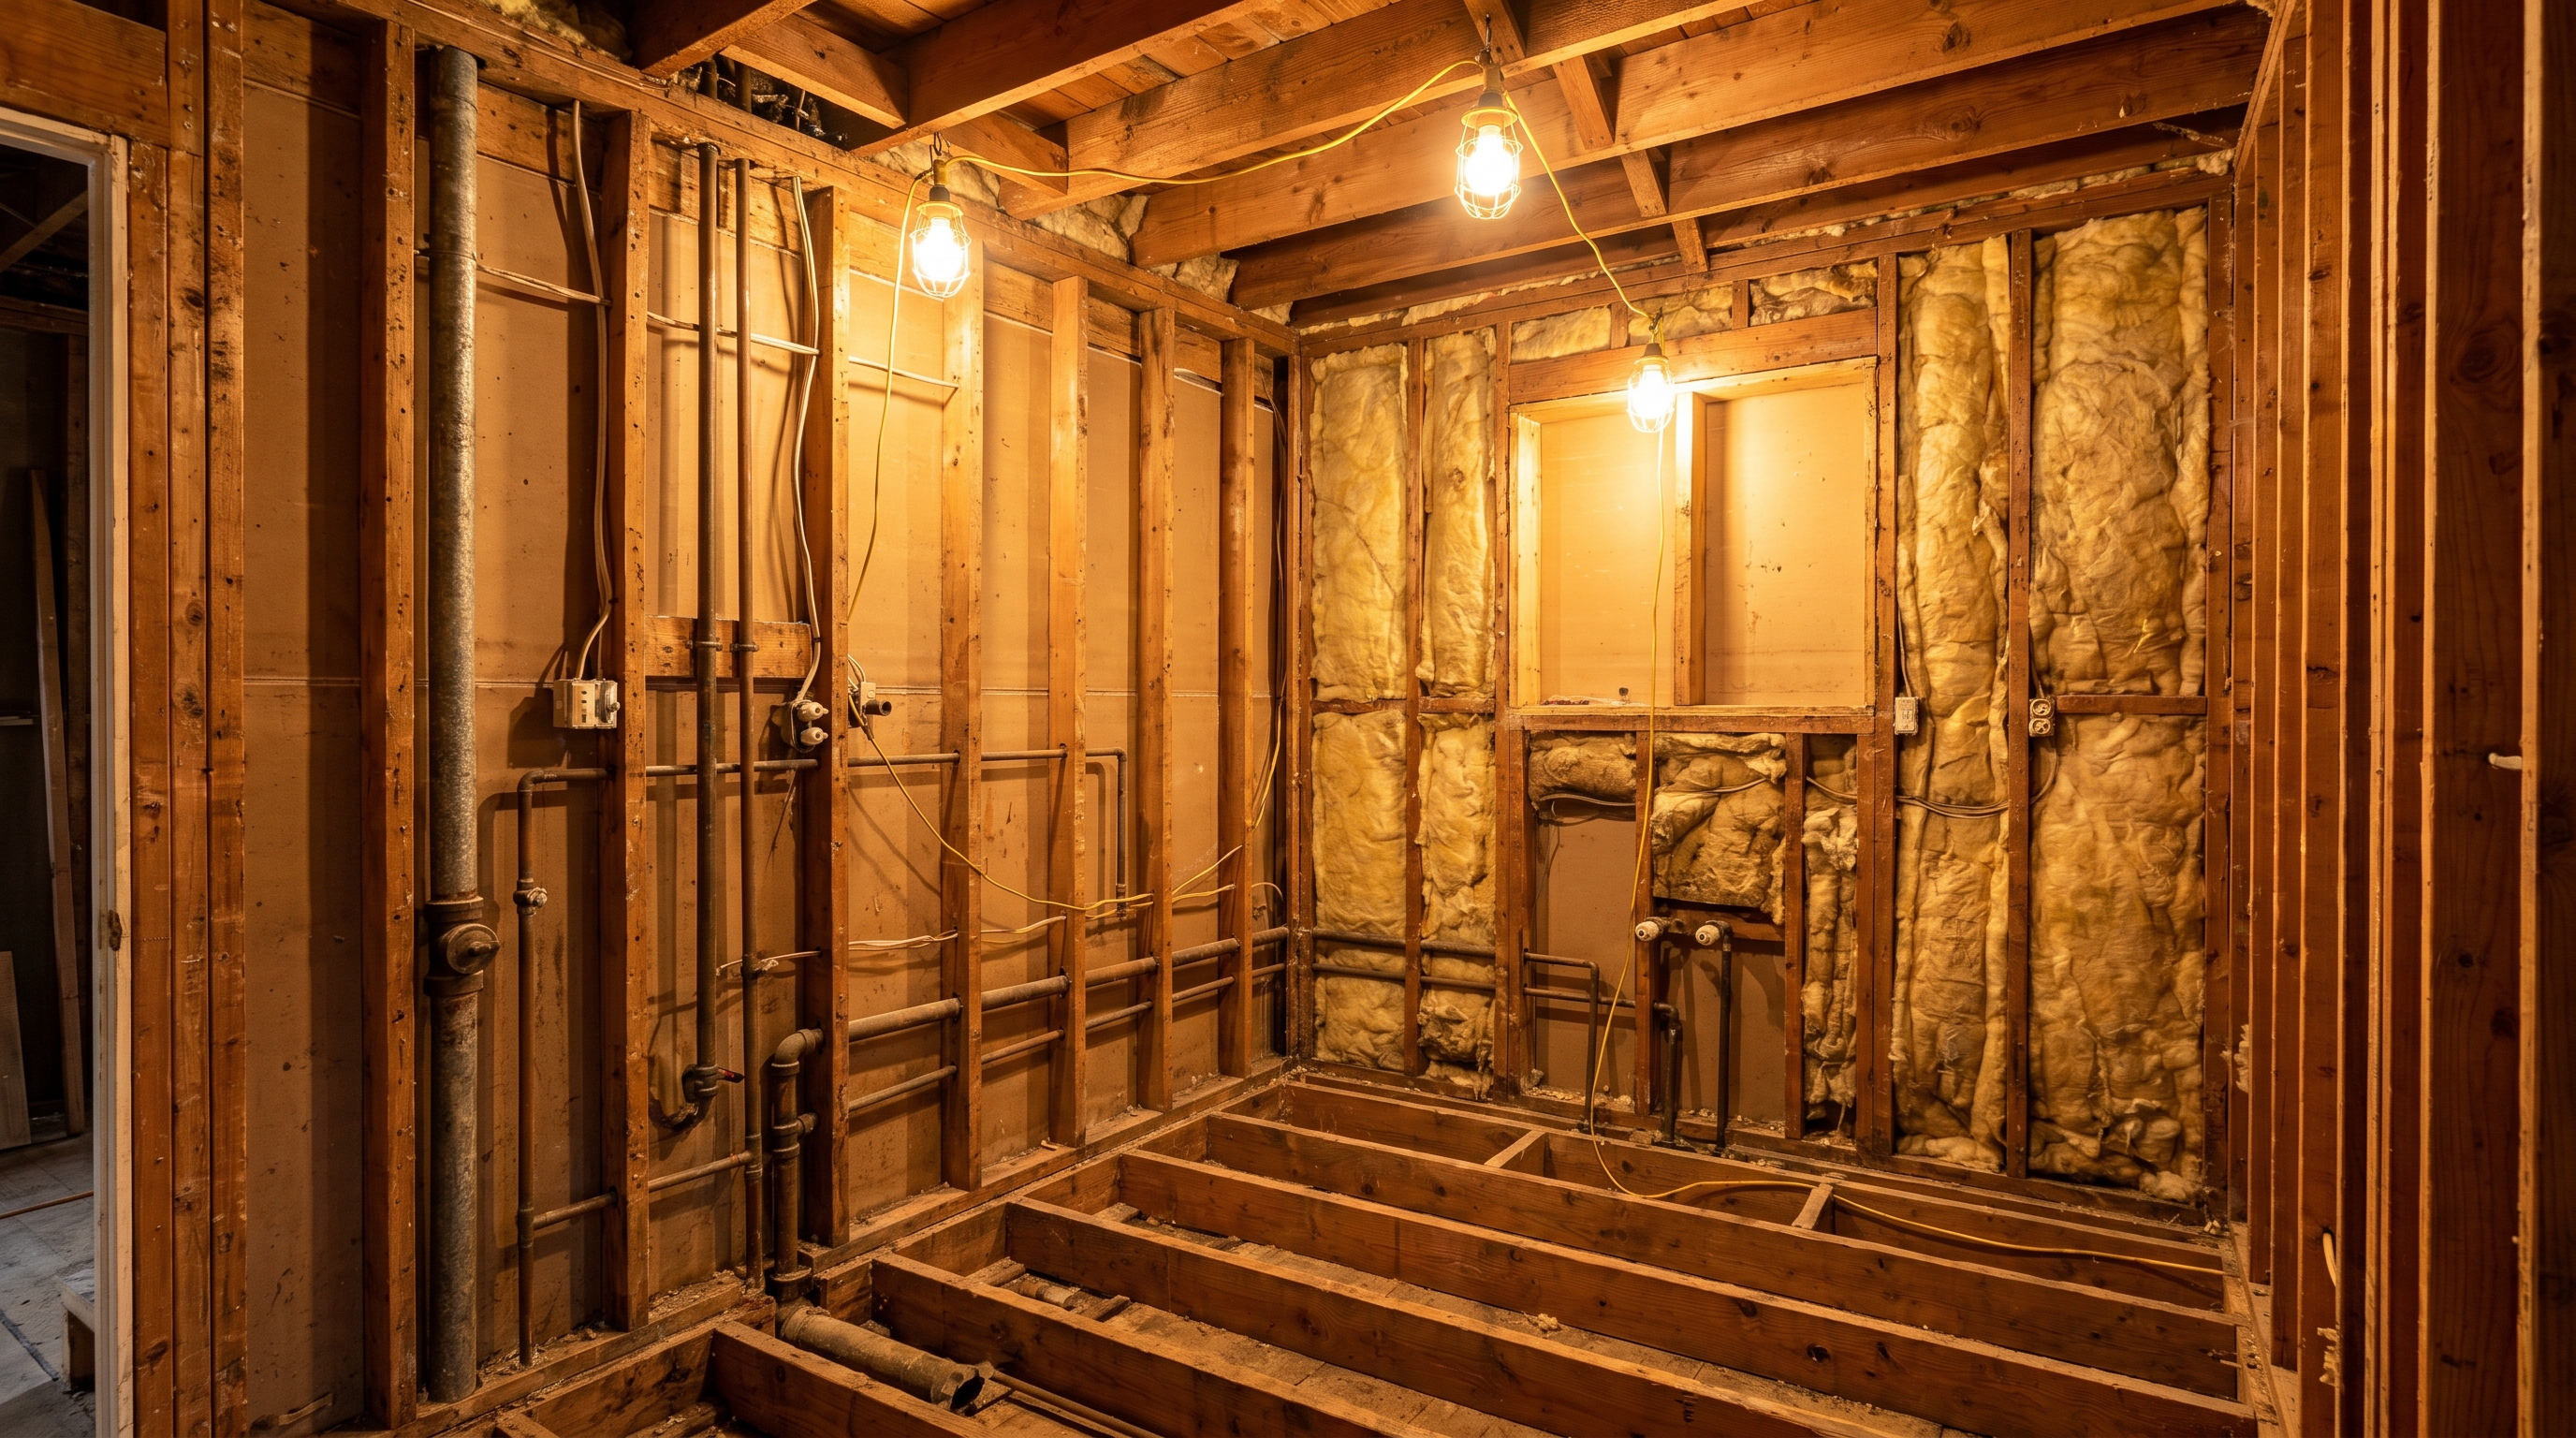
For a full gut-to-studs remodel, the drywall comes down after the flooring. This exposes the framing, wiring, plumbing, and insulation. It’s also where I document everything.
I photograph every wall cavity showing pipe locations, wire runs, and any structural details. Those photos save thousands of dollars in future repairs because you’ll know exactly where things are behind the finished walls. This costs nothing and takes 10 minutes. No excuse to skip it.
If the project includes opening up the kitchen, wall removal happens last in the demo sequence. I bring in a structural engineer ($300 to $600) before touching any wall that might carry a load. In Pierce County’s older housing stock, walls that look non-load-bearing often carry roof loads or support floor joists above. Guessing wrong is a $15,000 mistake.
Step 7: Cleanup and Dumpster Haul
A full kitchen gut generates 3 to 5 tons of debris. I use a 15 to 20-yard roll-off dumpster from a local Pierce County hauler. Under-ordering the dumpster size to save $100 is a common mistake. A second delivery and exchange fee runs $150 to $200, wiping out whatever you thought you saved.
What’s Hiding Behind Your Kitchen Walls
This is the section I wish every homeowner would read before signing a contract. My dad told me early in my career: the work behind the walls matters just as much as the finished surface. Demo day proves that every time.
Here’s what I find regularly in Pierce County homes built before 1980:
Knob-and-Tube Wiring (Pre-1950 Homes)
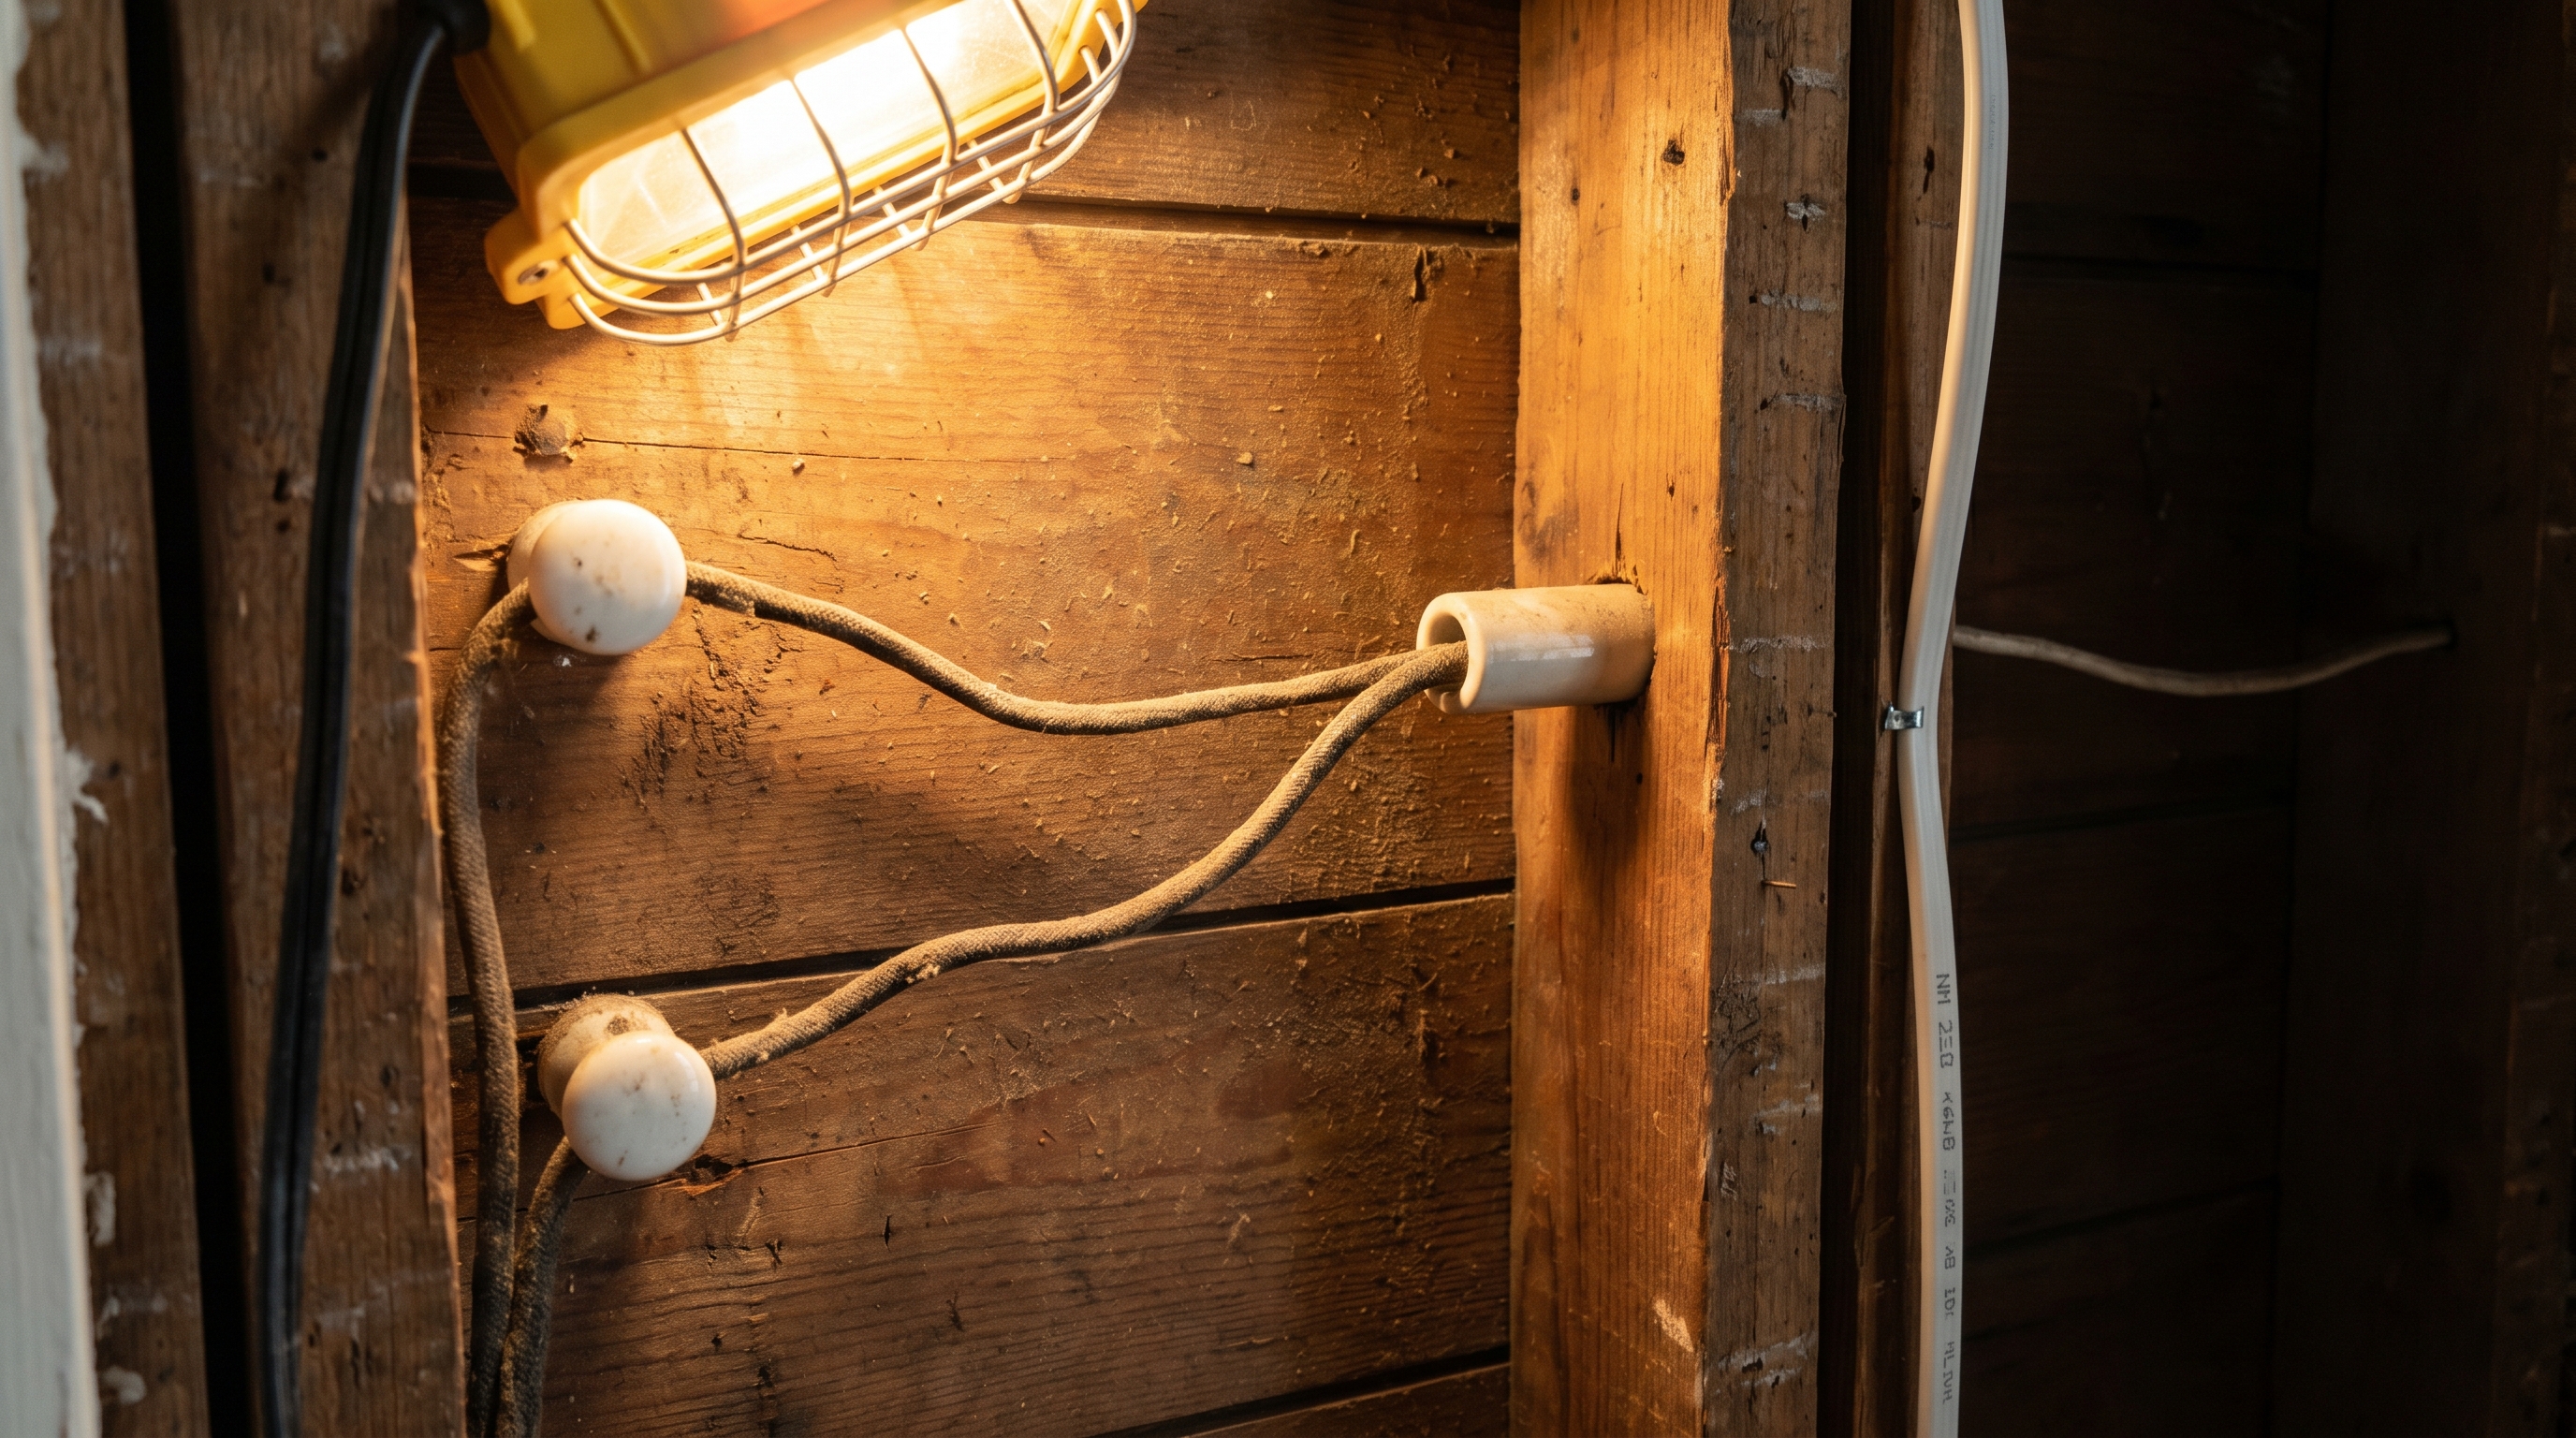
Common in older Puyallup and Tacoma neighborhoods. You cannot insulate over knob-and-tube, and it doesn’t meet modern code. Replacement for the kitchen portion runs $3,000 to $8,000 depending on how far the runs extend.
Galvanized Steel Pipes (1940s-1970s)
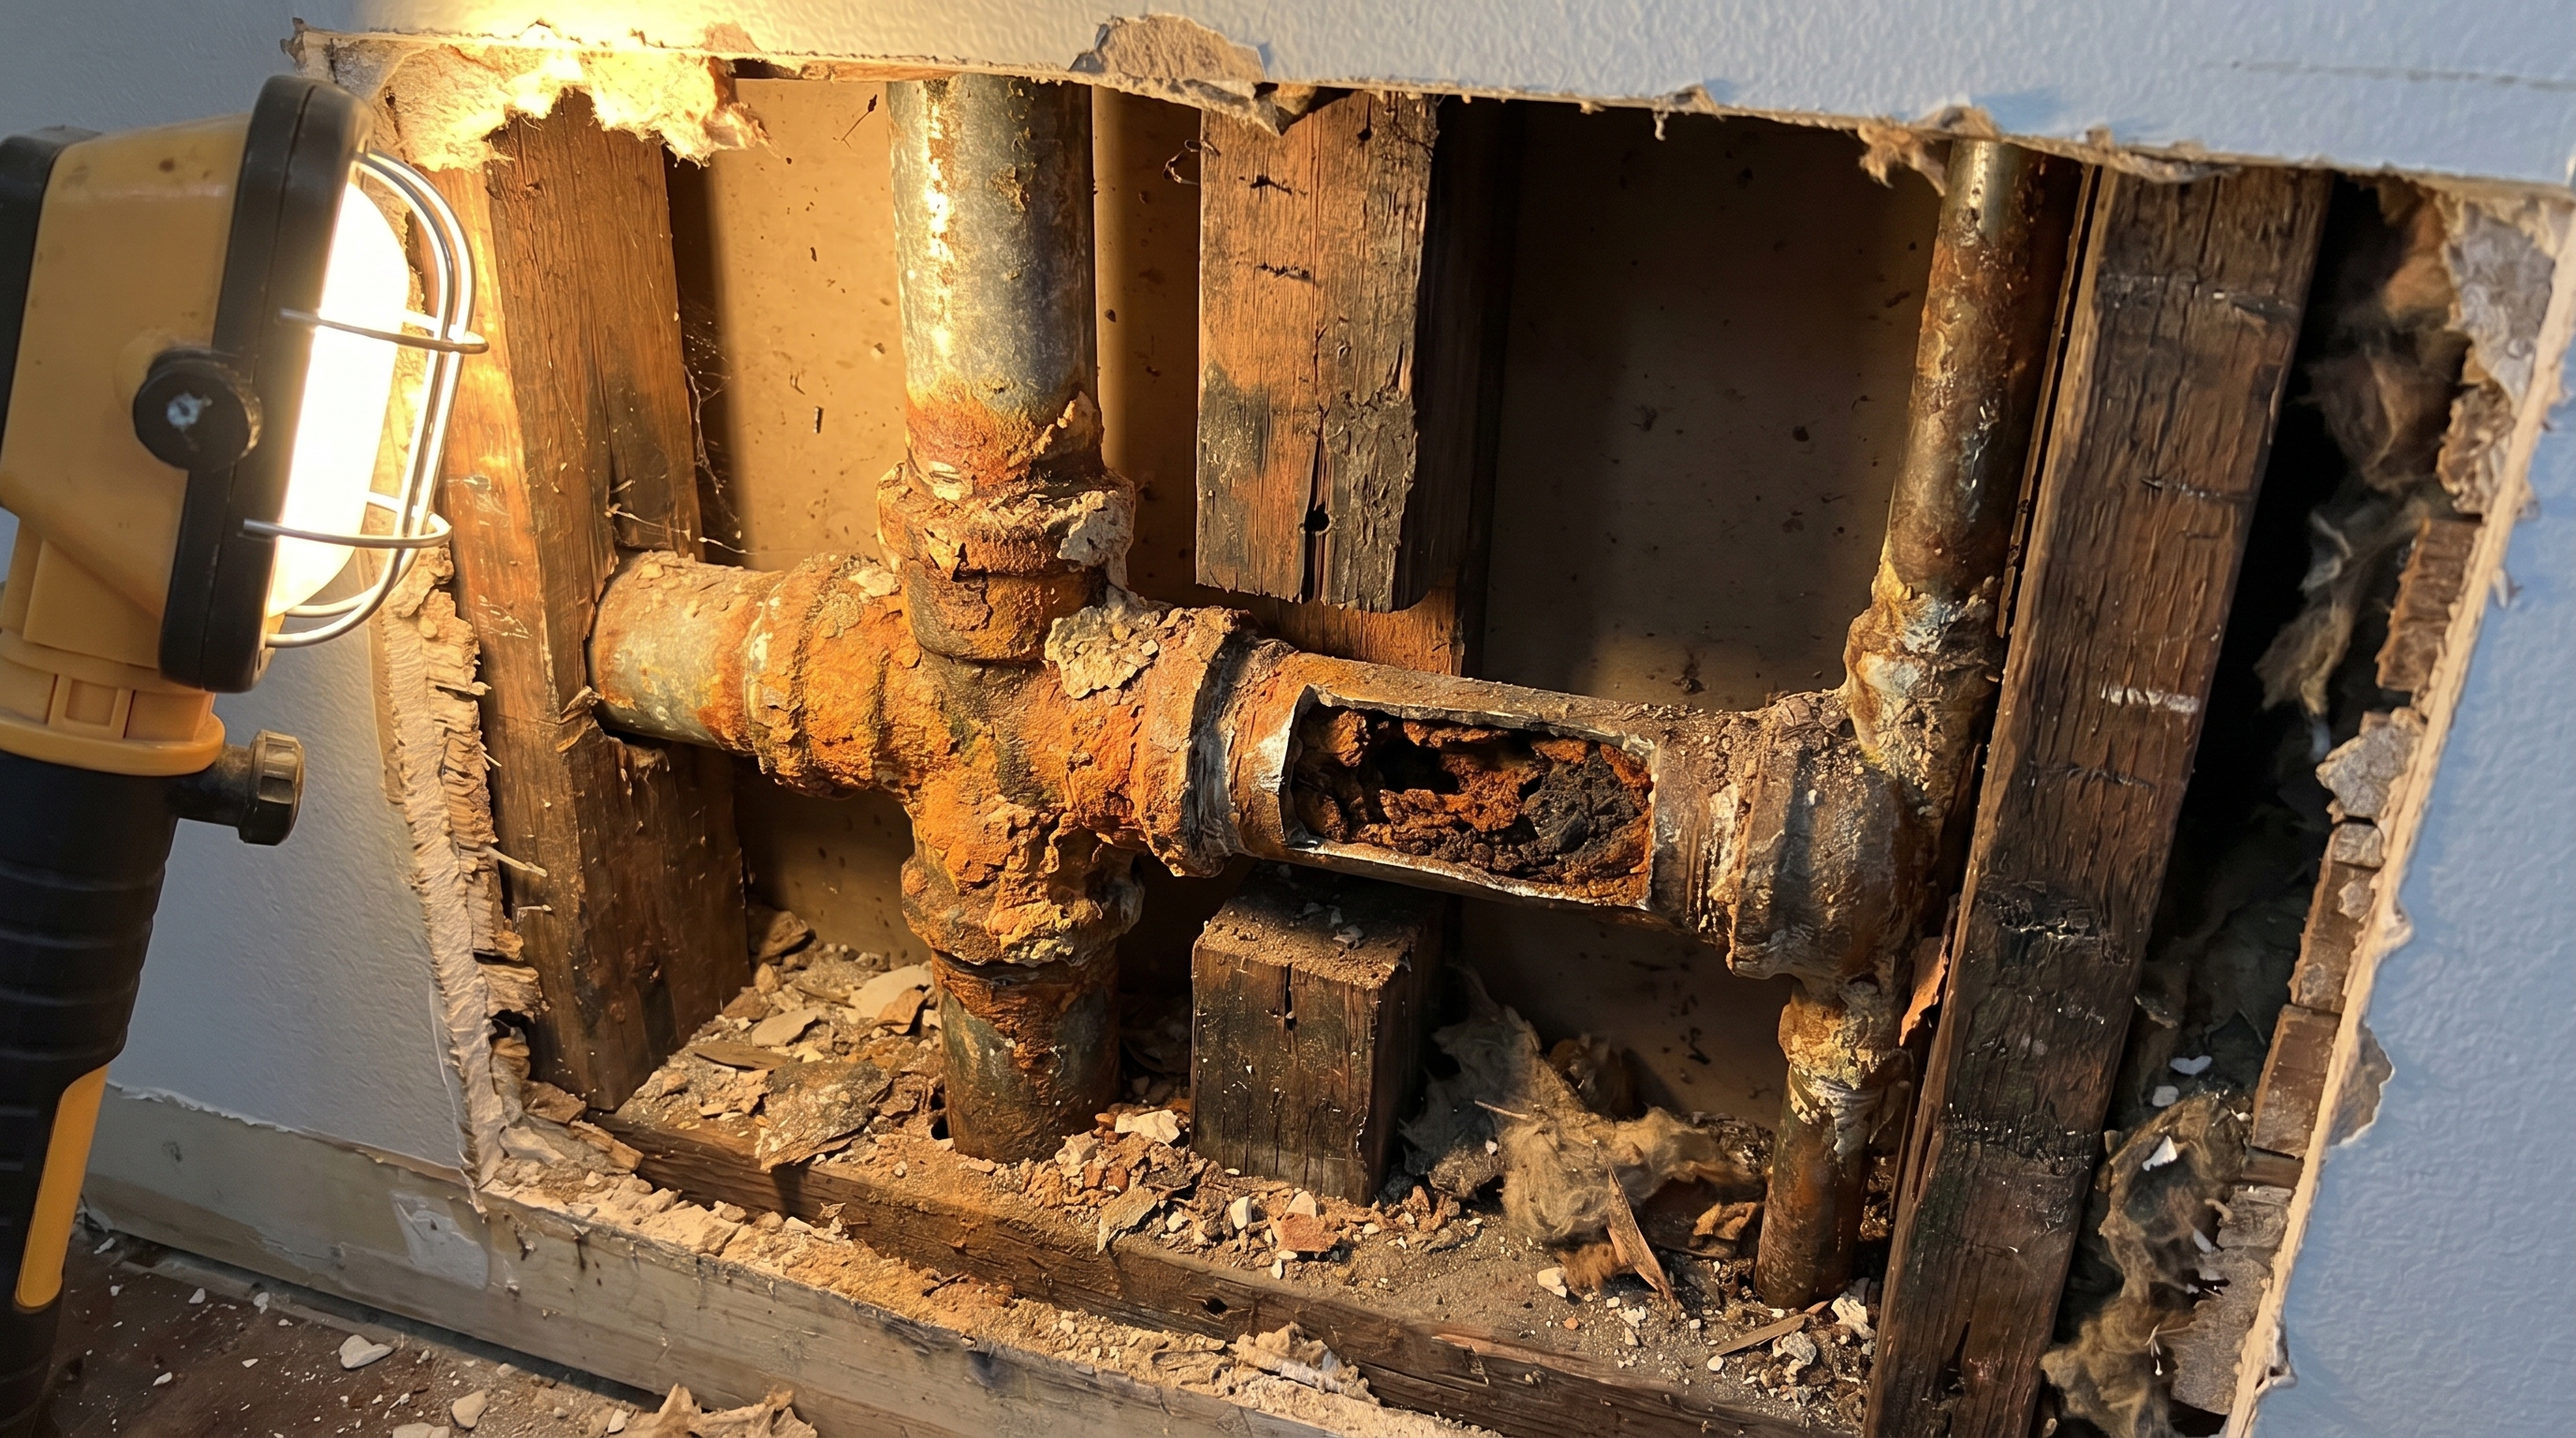
These corrode from the inside out over 40 to 60 years. I find restricted flow, pinhole leaks, and rust-colored water in the supply lines. Replacing kitchen plumbing during the remodel costs $1,500 to $4,000. It’s far cheaper to do it now, with the walls open, than after the drywall goes back up. For more on plumbing considerations, see my plumbing services guide.
Asbestos in Floor Tiles and Joint Compound
Nine-inch-by-nine-inch vinyl tiles manufactured before 1980 almost always contain asbestos. So does the drywall joint compound used before 1977. Testing before demo is required by Washington state law.
Professional sampling costs $300 to $500 for 3 to 5 material samples with lab analysis. If the test comes back positive, abatement adds $1,500 to $6,000 depending on the material and square footage. The abatement contractor must hold WA Department of Health certification. No shortcuts here.
Lead Paint on Cabinets and Trim
Any home built before 1978 may have lead paint. Contractors working in pre-1978 homes must hold EPA RRP (Renovation, Repair, and Painting) certification. Containment and safe work practices add $1,000 to $4,000 to the demo scope.
Rotted Subfloor and Floor Joists
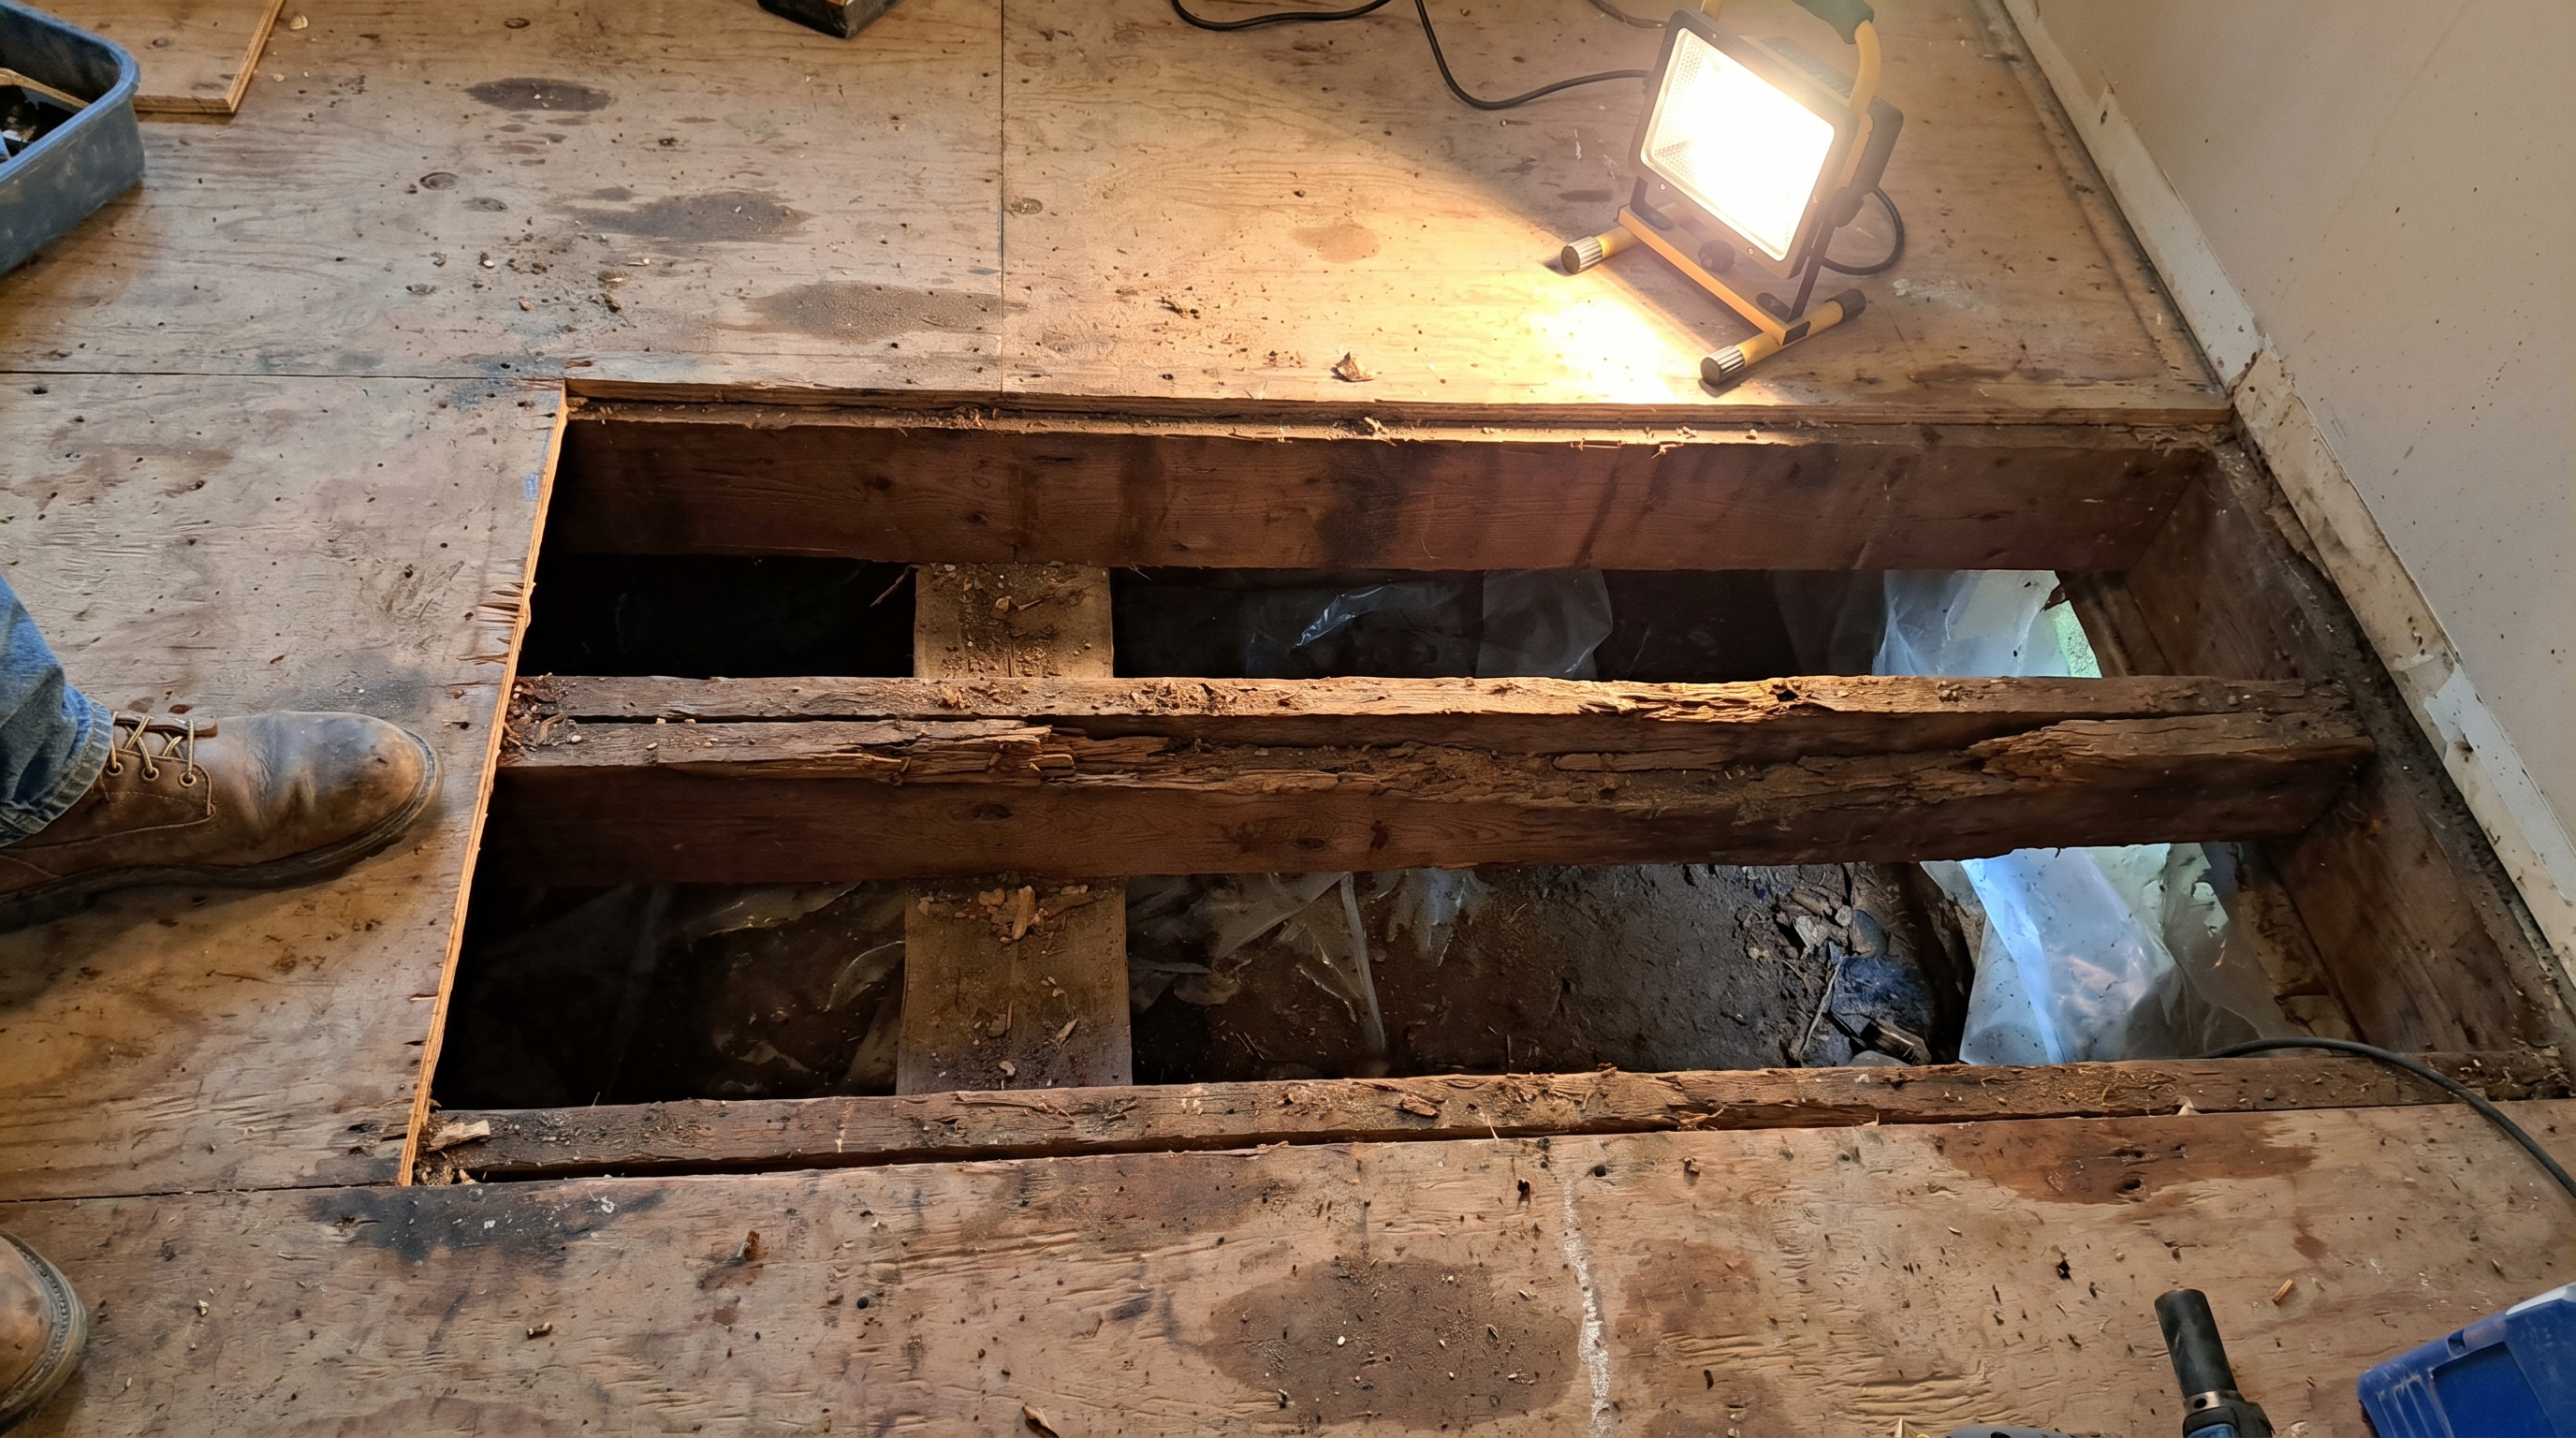
Pierce County’s clay-heavy soil retains water. Crawl spaces under kitchens stay damp for months. I find rotted subfloor patches and deteriorated floor joists on about 1 in 3 full gut jobs in homes built before 1975.
Joist sistering runs $80 to $150 per joist. Full joist replacement costs $150 to $250 per joist. Subfloor replacement averages $3 to $5 per square foot installed. This isn’t optional. You can’t set new cabinets on a soft floor.
Missing or Damaged Vapor Barrier
When I open the floor, I always check the crawl space below. A missing or torn vapor barrier means ground moisture has been wicking into the subfloor for years. Proper vapor barrier installation costs $800 to $2,500 and should happen while the kitchen is open. It’s one of those “do it now or pay more later” situations.
If you want to avoid the most common pitfalls, my guide on how to avoid common remodeling mistakes covers the full list. Most of them start with not knowing what’s behind the walls.
A Real Demo Day: South Hill Ranch, Built 1967
Let me walk you through an actual project so you can see how this plays out.
Last fall I demoed a kitchen in a South Hill ranch, about 160 square feet, original to the 1967 construction. The homeowner wanted a complete gut remodel with an island addition and new layout.
What the homeowner expected: Pull out old cabinets, remove flooring, tear out drywall. Two days, maybe three.
What actually happened:
- Day 1: Shut off utilities, removed appliances and upper cabinets. Found knob-and-tube wiring behind the uppers on the east wall. Called the electrician.
- Day 1 (afternoon): Removed countertops (old laminate, easy) and lower cabinets. Discovered 2 inches of water staining on the drywall behind the sink cabinet. Moisture had been wicking for years.
- Day 2: Pulled flooring. Found 9”x9” vinyl tiles under the sheet vinyl. Stopped work immediately and ordered asbestos testing. Results came back positive 5 days later.
- Day 8: Certified abatement crew removed asbestos-containing tiles. Air clearance testing passed.
- Day 10: Resumed demo. Removed drywall to studs. Found galvanized supply lines with visible corrosion and a rotted sill plate on the exterior wall.
- Day 12: Structural repair on the sill plate ($1,800) and plumbing replacement ($2,600) completed. Kitchen fully stripped and ready for rebuild.
Original demo estimate: $3,200 for the gut. Final demo cost with surprises: $9,400 (including $2,800 in asbestos abatement).
This is why I tell every homeowner: budget 15-20% contingency on top of the demo estimate for homes built before 1980. The surprises aren’t rare. They’re expected.
The full kitchen remodel timeline explains how demo fits into the bigger picture and why these early surprises affect every phase that follows.
Your Pre-Demo Checklist
Before demo day arrives, handle each of these items. Print this out, tape it to your fridge (before I remove it), and check off each one.
- Get hazmat testing completed if your home was built before 1980 (budget $300-$800)
- Empty all kitchen cabinets, drawers, and the pantry completely
- Remove everything from countertops, windowsills, and walls
- Clear a path from the kitchen to the exterior door for debris removal
- Set up a temporary kitchen in your garage, laundry room, or dining room (mini fridge, microwave, single burner)
- Disconnect and move the refrigerator contents to a cooler or second fridge the night before
- Confirm your contractor has pulled all necessary permits
- Seal off HVAC registers and return vents in the kitchen with plastic and tape
- Protect adjacent flooring with Ram Board or heavy-duty paper ($0.35-$0.50/sq ft)
- Talk to your neighbors. Demo is loud. A quick heads-up goes a long way, especially in South Hill and Sumner subdivisions where homes sit 10 to 15 feet apart.
- Plan meals for 6 to 14 weeks without a functioning kitchen. A family of four eating out three times a day spends $150+ per week. A crockpot and a microwave in the garage save real money.
Can You Demo Your Own Kitchen?
I get asked this a lot. The honest answer: partially, yes. But with serious limits.
What you can handle yourself:
- Remove cabinet doors and drawers
- Unscrew and remove upper and lower cabinet boxes (after countertops are off)
- Remove laminate countertops
- Pull up non-hazardous flooring (no asbestos tiles)
- Remove drywall (if no hazmat concerns)
- Load a dumpster
What you need a licensed professional for (Washington state law):
- Any electrical disconnect or reconnect (requires WA EL-01 or EL-02 license)
- Gas line disconnect or capping (requires WA licensed plumber)
- Asbestos or lead abatement (requires WA DOH certification)
- Structural wall assessment and removal (requires structural engineer + licensed contractor)
- Plumbing beyond simple fixture removal
I’ve seen DIY demo go wrong two specific ways. First, a homeowner cuts into a wall that turns out to be load-bearing. The ceiling sags, and now you’re looking at emergency shoring and a structural beam install, $8,000 to $15,000 to fix. Second, someone rips up old vinyl tiles without testing, fills the house with asbestos fibers, and the professional abatement cost for airborne contamination runs 3 to 5 times what controlled removal would have cost.
If you want to do your own demo to save money, have your contractor walk the kitchen with you first. Let them identify the hazards. Then you handle the muscle work, and they handle anything that needs a license. For a mid-range project, DIY demo can save $800 to $2,000 in labor. But only if you don’t create a bigger problem.
Permits and Inspections for Kitchen Demolition in Pierce County
Not every demo needs a permit. Here’s the breakdown:
No permit required:
- Removing cabinets, countertops, and non-structural elements
- Pulling up flooring (assuming no hazmat)
- Cosmetic drywall removal on non-structural walls
Permit required:
- Removing any wall (load-bearing or not) in Pierce County
- Disconnecting or capping plumbing lines
- Modifying or disconnecting electrical circuits at the panel
- Altering HVAC ductwork
Pierce County permit fees for residential remodel work range from $250 to $600 for a standard building permit, plus $85 to $150 each for separate electrical and plumbing permits. I submit permits early in the planning phase so we’re not waiting around once demo starts. For full details on what requires a permit, read my Puyallup remodeling permits guide.
Washington state also requires your general contractor to hold active L&I registration. Verify any contractor at lni.wa.gov before signing anything. Specialty trades (electrical, plumbing) need their own separate state licenses.
How to Protect the Rest of Your Home During Demo
Demo creates dust. A lot of dust. In Pierce County’s damp climate, that dust mixes with ambient moisture and promotes mold growth on surfaces where it settles. Here’s how I protect the rest of your home:
- Plastic sheeting barriers between the kitchen and adjacent rooms, taped floor to ceiling
- Negative air pressure machine running during all active demo work. Rental runs about $75 to $100 per day.
- Sealed HVAC vents. Demo dust entering your duct system circulates through every room in the house. I tape off every register and return in the kitchen before demo starts.
- Floor protection in adjacent rooms. Ram Board or builder’s paper on any flooring you’re keeping. Dragging debris across hardwood or LVP creates scratches you can’t buff out. If you’re considering new flooring, my LVP vs hardwood guide covers the durability differences.
- HVAC duct cleaning after the project. Not always necessary, but if demo runs more than 3 days and dust escaped the containment, professional duct cleaning runs $300 to $600.
Questions Homeowners Ask About Kitchen Demolition
How long does a full kitchen demolition take in Puyallup?
A full gut to studs on an average-sized kitchen (120 to 180 square feet) takes 2 to 4 days of active work. If I find asbestos or lead that requires abatement, add 1 to 2 weeks for the certified crew to do their work and pass clearance testing. Structural wall removal adds 2 to 5 days including the beam install. I always build a buffer into the project timeline for exactly these situations.
Do I need to move out during kitchen demolition?
No. But you will need a functioning temporary kitchen setup somewhere in the house. Most of my clients set up a folding table in the garage or laundry room with a mini fridge, a microwave, a single induction burner, and a coffee maker. Budget about $200 to $500 for temporary kitchen equipment, and plan to resell most of it afterward. The discomfort is real, but it’s temporary. A full kitchen renovation from demo to final walkthrough takes 10 to 16 weeks depending on scope and material lead times.
What if my contractor finds something unexpected during demo?
This is where your contingency budget matters. I tell every client to hold 15-20% of the project budget in reserve for surprises. When I open the walls and find rotted framing, outdated wiring, or hazardous materials, I document it with photos, explain the options, and provide a written change order before doing any additional work. No honest contractor should fix a surprise without your approval and a clear price first. Check my guide on choosing the right materials for remodeling to understand why the choices you make after demo directly affect long-term durability.
Is kitchen demo too loud for my neighbors?
Yes. Reciprocating saws, pry bars, dropping cabinets into a dumpster. Pierce County’s noise ordinance allows construction from 7:00 AM to 10:00 PM in residential areas. Puyallup city limits may vary, so I confirm local rules before scheduling. I always recommend giving your immediate neighbors a heads-up a few days before demo starts. It’s a small gesture that prevents complaints. If this was my mom’s house, I’d want the contractor to be considerate of the neighborhood.
Can I save my old cabinets during demolition?
Depends on the cabinets. Solid wood face-frame cabinets from the 1950s through 1970s are often worth saving. They’re built better than most stock cabinets sold today. Particleboard-box cabinets from the 1990s and later typically aren’t worth the extra time for careful removal. I charge $65 to $95/hour for selective demo (salvage work) versus $45 to $75/hour for standard tear-out because it takes more skill and time to preserve pieces intact. If you’re debating between saving your existing cabinets and starting fresh, my cabinet refacing vs. replacing guide can help you decide.
Also Serving Homeowners Across Pierce County
I’ve completed kitchen demolition and full remodel projects for homeowners in Tacoma, Bonney Lake, Sumner, Edgewood, South Hill, Lakewood, and Spanaway. Every community has its own housing stock and its own typical surprises. South Hill ranches tend toward galvanized pipes. Lakewood split-levels hide undersized electrical panels. Tacoma bungalows from the 1920s often have knob-and-tube wiring running through the kitchen walls. I’ve seen all of it, and I build that local knowledge into every estimate.
Ready to Plan Your Kitchen Demolition?
If you’re thinking about a kitchen remodel in Puyallup or anywhere in Pierce County, the first step is understanding exactly what’s behind your walls before the hammers swing. I provide free, no-obligation estimates with detailed, fixed-price proposals. No hidden fees. No surprise change orders after the fact. My dad taught me to take pride in my work and treat every homeowner the way I’d want my own family treated. That’s how I run every project.
Call me at (253) 392-9266 or contact us online to schedule your free kitchen remodel consultation. I’ll walk your kitchen, identify potential hazards, and give you an honest number before you commit to anything.
Brad Zemke, Owner Pacific Remodeling LLC Puyallup, WA